
Exterior Door Installation Costs: DIY vs. Professional
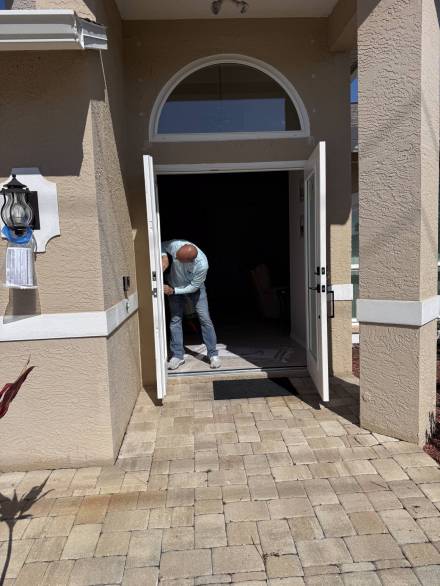
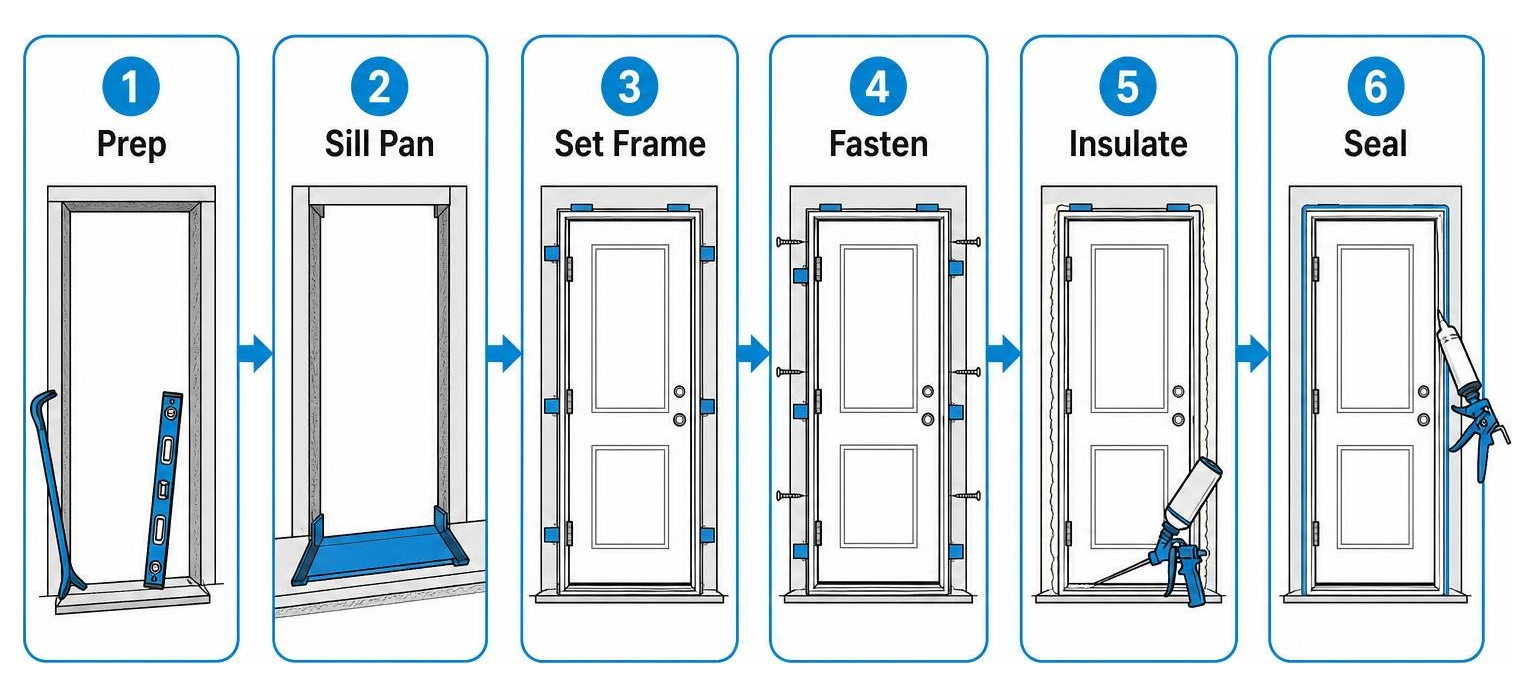
Exterior door installation typically costs between $300 and $800 in DIY materials and consumables, or $400 to $1,200 in professional labor plus the cost of the door unit. The core installation process involves preparing a level and flashed rough opening with a rigid sill pan, dry-fitting and shimming the prehung frame plumb and square, anchoring through the hinge and strike jambs into solid framing, and insulating the perimeter with low-expansion foam.
According to the U.S. Department of Energy, air leaks around doors and windows can account for 25% to 30% of a home’s heating and cooling energy use, making precise installation essential for long-term efficiency. Recognizing early signs of door failure, such as water intrusion, sticking slabs, rotted framing, or escalating energy bills, helps determine the appropriate scope of work before small flaws lead to structural subfloor damage.
| Project Factor | DIY Installation | Professional Installation |
|---|---|---|
| Average Labor Cost | $0 (Self-performed) | $400 – $1,200 |
| Material & Consumables Cost | $300 – $800 | Included in project estimates or itemized |
| Typical Time Investment | 3.0 – 4.0 hours (Experienced) / 4.0+ hours (Novice) | 1.5 – 2.5 hours |
| Tool Requirement | Extensive (4-ft levels, masonry drills, impact drivers, sealant guns) | Professional-grade trade tooling supplied |
| Permitting & Impact Compliance | Homeowner responsible for local filings | Handled directly by certified contractor |
| Framing Repair Capability | Limited to basic wood replacement | Full structural bucking and framing repair |
Material and Tool Expenses for DIYers
Taking the DIY route still requires purchasing specialized hardware, tools, and consumables. Skimping on supplies can compromise the weather resistance and longevity of your entrance. Before purchasing materials, reviewing an entry door options comparison helps identify the right construction type—such as insulated fiberglass, steel, or solid wood—for your budget and home design.
Your installation checklist should include:
- Fasteners: 3-inch #8 or #10 exterior-grade corrosion-resistant structural wood screws, 2-1/2-inch finish screws, and heavy-duty concrete masonry anchors (Tapcons) if securing to block.
- Shims: High-density composite or vinyl shims. Avoid basic untreated wood shims at the bottom of the jamb or threshold where moisture can cause rot and swelling.
- Insulation: AAMA-812 certified low-expansion polyurethane foam specifically formulated for window and door jambs. Standard high-expansion spray foam must never be used, as it exerts enough outward force to bow the frame and bind the door.
- Sealants & Flashing: High-grade neutral-cure silicone (meeting AAMA 808.3 standards) or elastomeric polyurethane sealant, 4-inch self-adhering flashing tape, and a preformed rigid sill pan with an integrated sloped profile.
- Core Tools: 4-foot and 2-foot precision levels, hammer, pry bar, tape measure, heavy-duty caulking gun, cordless drill/impact driver, masonry bits, and protective eye and ear gear.
Professional Labor and Structural Factors
While DIY installs save on upfront labor, unexpected structural challenges can complicate a project. In coastal and high-humidity areas, removing an old door frame often exposes hidden water damage, rotted subflooring, or compromised studs. Professional installation costs generally run between $400 and $1,200 for labor, reflecting the expertise needed to address structural repairs, install custom wood bucking, and verify strict wind-load compliance.
Opting for professional door services ensures your opening is rebuilt correctly, anchored against severe weather pressure, and backed by comprehensive labor and manufacturer warranties.
Rough Opening Preparation and Weatherproofing
The long-term performance of an exterior door depends entirely on the preparation of the rough opening. A rough opening that is out of plumb or out of square forces the new frame into a twist, leading to sticking latches, crushed weatherstripping, and air leaks.
Rough Opening Dimensions and Squaring Tolerances
Before setting a new prehung unit, measure the rough opening width and height in three distinct places: top, middle, and bottom for width; left, center, and right for height.
- Sizing Rules: The rough opening should be approximately 3/4″ wider and 1/2″ taller than the outside frame dimensions of the prehung unit (which equates to roughly 2″ wider and 2″ to 2-1/2″ taller than the nominal door slab dimensions). This creates a 1/4″ to 3/8″ perimeter gap for shimming and insulation. Take time selecting proper door dimensions to ensure adequate clearance without exceeding maximum structural fastener reach.
- Squaring Tolerances: Measure diagonally from top-left to bottom-right, then top-right to bottom-left. The difference between the two diagonal measurements must not exceed 1/4″.
- Plumb and Level Tolerances: Check both side studs with a 4-foot level and the sill with a 2-foot level. The maximum allowable deviation across the entire rough opening is 1/8″. If the subfloor is sloped, shim or use a leveling compound before setting the sill pan.
Sill Pan Installation and Flashing Protocols
Water intrusion under the threshold is the leading cause of rotted subfloors and framing. Installing a rigid PVC or composite sill pan is the most reliable way to protect against leaks.
- Prepare the Subfloor: Clean all debris, old sealant, and fasteners from the floor. Ensure the subfloor is flat and level.
- Apply Bedding Sealant: Run three continuous 3/8-inch beads of exterior-grade neutral-cure silicone or elastomeric sealant directly across the subfloor where the sill pan will rest.
- Position the Sill Pan: Set the preformed rigid sill pan into the wet sealant, confirming it features a positive outward slope. Press down evenly with a J-roller to ensure full adhesion.
- Integrate Weather-Resistant Barriers (WRB): Cut the house wrap or weather barrier at 45-degree angles from the top corners, fold the flaps into the opening, and staple them to the interior framing every 12 to 16 inches.
- Flashing Tape Application: Apply 4-inch self-adhering flashing tape over the sill pan upturn, extending at least 6 inches up each rough jamb stud and 9 inches beyond the sides of the opening, rolling it flat to eliminate air pockets.
Step-by-Step Guide to Setting and Fastening the Unit
A complete prehung exterior door with an insulated core and hardware can easily weigh well over 100 pounds. Never attempt to lift, position, and fasten a heavy unit alone; always use a two-person lift to protect the door frame from racking and prevent personal injury.
Essential Steps for Prehung Exterior Door Installation
- Dry-Fit the Frame: Carefully set the prehung unit into the prepared rough opening to check clearances and confirm the threshold sits flat. Verify that you have an even 1/4″ to 3/8″ gap on both side jambs and along the header.
- Apply Perimeter Sealant: Remove the unit temporarily and lay down two continuous 3/8-inch beads of sealant along the exterior face of the rough opening where the exterior trim or brickmould will seat.
- Set the Door Unit: Lift the unit back into place, resting the threshold firmly onto the sill pan first, then tipping the top of the frame inward. Keep the door slab closed in its frame during placement; never swing the slab open past 30 degrees until the jambs are anchored, as the unsupported weight can rack the frame.
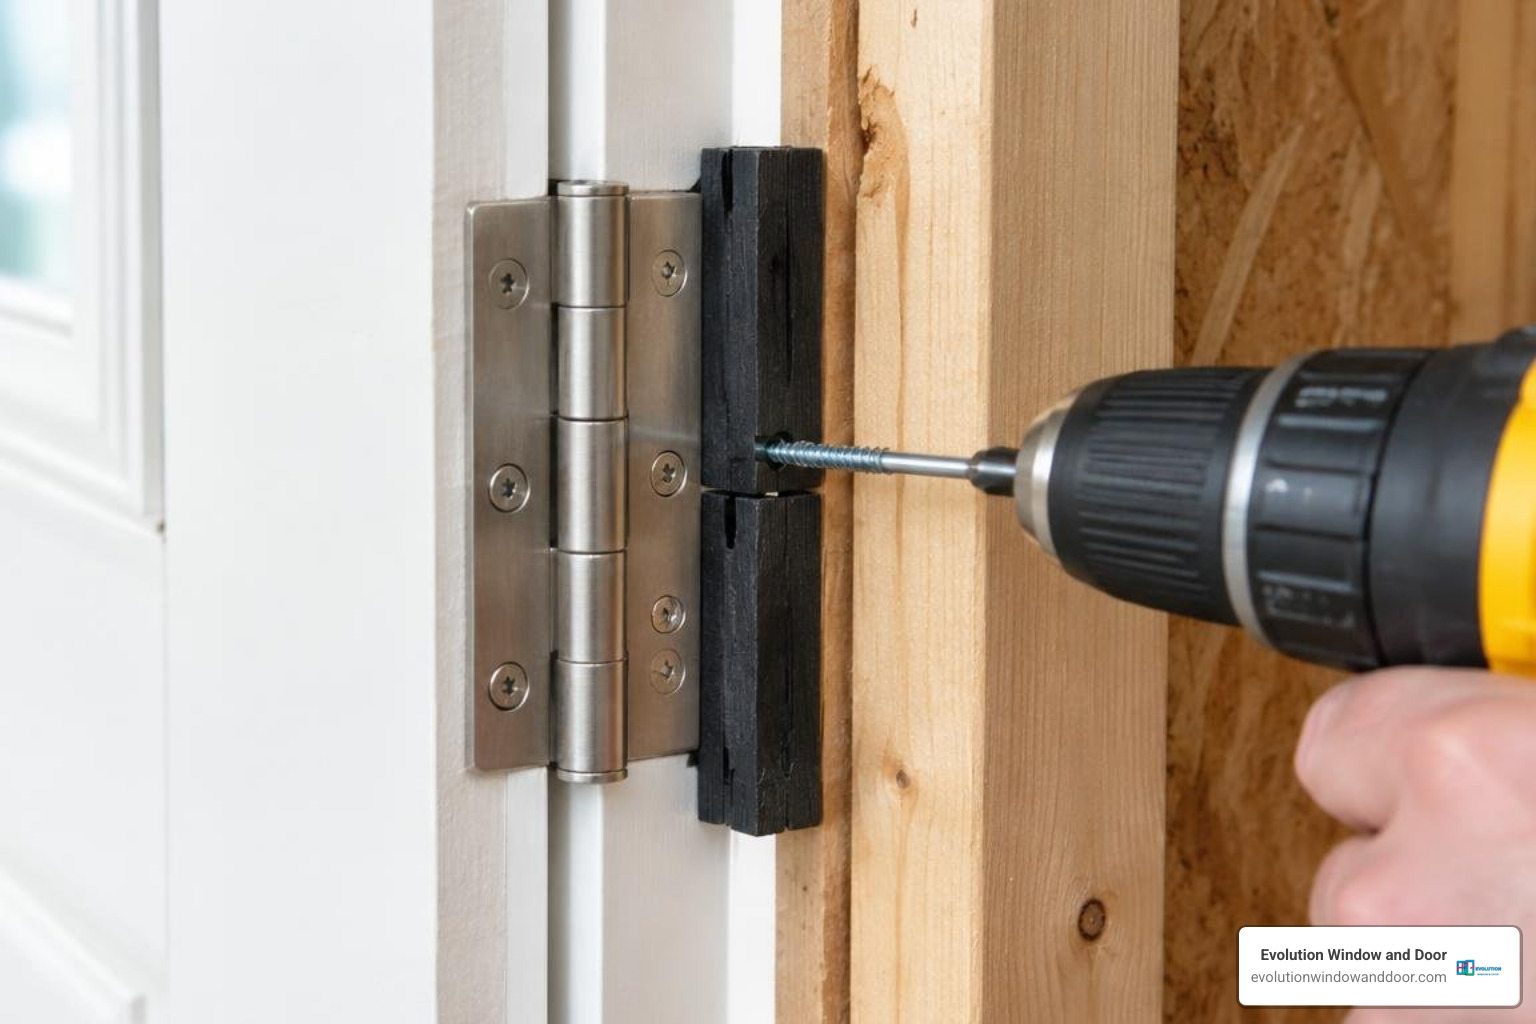
- Shim the Hinge Jamb First: Place paired composite shims on the hinge side, positioning them directly behind each hinge location. Check the hinge jamb with a 4-foot level across both the face and the edge. Adjust the shims until the hinge side is straight, plumb, and square.
- Fasten the Hinge Jamb: Drive structural 2-1/2″ to 3″ screws through the hinge jamb shims and into the framing studs. On the top and middle hinges, remove one factory screw closest to the weatherstrip and replace it with a 3-inch screw that penetrates at least 1-1/2 inches into the solid structural stud.
- Shim and Align the Strike Jamb: Move to the latch side. Place paired shims at the top corner, middle latch height, and bottom corner. Adjust shim depth until the reveal—the margin between the door slab edge and the frame—is a uniform 1/8″ across the entire top and sides.
- Anchor the Strike Plate: Drive 3-inch structural screws through the deadbolt and strike plate holes directly into the rough framing to reinforce against forced entry.
- Insulate the Shim Cavity: Fill the perimeter gap between the door frame and rough studs using low-expansion spray foam. Avoid overfilling; apply a neat, continuous bead to create an airtight thermal break without exerting pressure on the jambs.
Masonry vs. Wood Framing in Exterior Door Installation
Installing a prehung door into a concrete block (CMU) masonry wall requires different anchoring methods than standard wood-stud framing:
- Treated Wood Bucking: In masonry openings, a pressure-treated wood buck (typically 1x or 2x lumber) is anchored directly to the concrete block using concrete masonry screws countersunk flush. The door frame is then shimmed and fastened to this structural buck.
- Direct Masonry Anchoring: Where no buck is present, the frame is shimmed and anchored directly into the masonry using heavy-duty masonry fasteners driven through pre-drilled holes in the jamb.
- Expansion Joints: Concrete, stucco, and masonry expand and contract differently than wood or fiberglass door frames. Maintain a 3/8″ to 1/2″ perimeter expansion joint between the exterior frame edge and the stucco or brick veneer. Pack this gap with a closed-cell backer rod and seal it completely with high-grade elastomeric sealant to prevent structural stress cracks.
Post-Installation Adjustments, Sealing, and Maintenance
Once the unit is securely anchored, fine-tune the hardware, sweep, and perimeter seals. Browsing a complete exterior doors catalog can give you an idea of how factory-integrated multi-point locks, adjustable hinges, and threshold systems fit together.
Threshold Sweep and Hardware Alignment
- Adjustable Sill Calibration: Most modern prehung doors feature an adjustable sill threshold with recessed riser screws. Turn the screws clockwise to lower the threshold cap or counterclockwise to raise it.
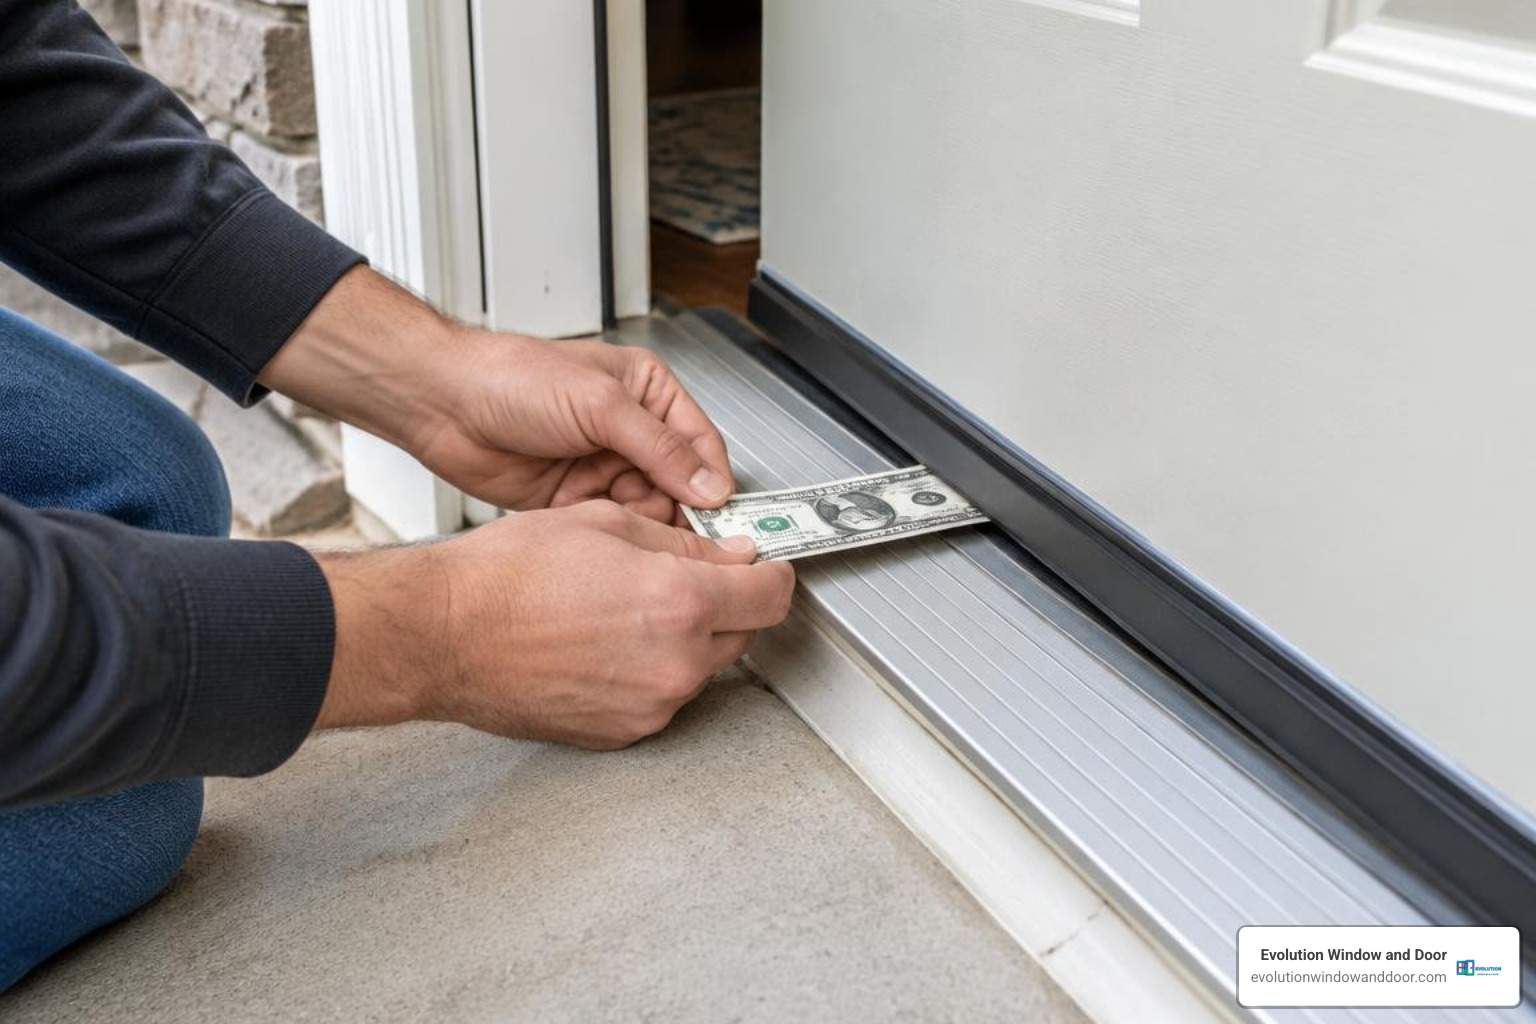
- The Dollar Bill Test: Close the door on a dollar bill placed between the bottom sweep and the threshold cap. Pull the bill outward: you should feel light, even resistance across the entire width of the door without the paper tearing. If the bill slides out freely, raise the sill cap; if it binds or tears, lower it slightly.
- Adjustable Hinge Alignment: If the top latch reveal is uneven or the door sags slightly, adjust the hinge plates (if equipped) to fine-tune alignment within a 1/8″ horizontal and 3/8″ vertical tolerance range.
- Exterior Weatherproofing: Caulk the exterior trim perimeter where it meets the exterior wall siding or stucco. Do not caulk the bottom front edge of the threshold pan; leaving this bottom weep area open allows incidental moisture to drain out safely.
Material-Specific Finishing and Warranty Requirements
To preserve structural integrity and maintain manufacturer warranty coverage, finish your door promptly based on its core material:
- Wood Doors: All six sides of the door slab (front, back, top, bottom, and side edges) must be sealed with high-grade exterior primer and paint or UV-blocking stain and clear topcoat within a short window after installation. Leaving the top or bottom edge unsealed will void manufacturer warranties and cause moisture absorption, warping, and panel delamination.
- Fiberglass Doors: Clean the surface with mild solvent, apply a specialized bonding primer if unprimed, and apply two coats of premium exterior 100% acrylic latex paint. For woodgrain textures, apply a pigmented wiping gel stain followed by two coats of exterior marine-grade or UV-inhibiting polyurethane clear coat.
- Steel Doors: Factory-primed steel requires high-quality exterior acrylic enamel paint to prevent oxidation and rust. Inspect paint annually, especially around bottom seams and glass insert mouldings.
Frequently Asked Questions About Entry Doors
How do you fix a sticking or misaligned exterior door?
A sticking door is usually caused by an out-of-square frame, loose hinge screws, or seasonal house settling. First, inspect the reveals around the door slab. If the top lock-side corner rubs against the jamb, tighten the top hinge screws. If the screws spin freely, replace them with 3-inch structural wood screws that reach into the wall stud. If the frame is racked, remove the interior trim, back out the frame screws slightly, adjust the composite shims behind the sticking location, and re-fasten.
Why is a sill pan critical for door weatherproofing?
A sill pan is a rigid, waterproof tray installed under the door threshold that catches water driven past the exterior seals and directs it away from the framing. Because wind-driven rain can push past standard weatherstripping, a sloped sill pan prevents moisture from reaching the wood subfloor or structural slab, protecting your home from hidden rot, mold, and costly subfloor repairs.
When should you hire a professional installer?
You should hire a licensed professional contractor when:
- The rough opening framing has extensive wood rot, termite damage, or structural sagging that requires header rebuilding.
- The door is going into a concrete block (masonry) or stucco wall requiring custom bucking and structural engineering.
- You are installing a heavy impact-rated door or oversized unit weighing over 100 pounds.
- Local building codes require certified engineering documentation, wind-load ratings, or municipal inspection permits.
Conclusion
A well-executed prehung entry door improves home security, reduces energy costs, and enhances curb appeal. While a straightforward swap can be a manageable project for an experienced DIYer, the precision required for plumb reveals, flashing integration, and wind-load anchoring often makes professional installation the safer, longer-lasting choice.
At Evolution Window and Door, we provide homeowners across Southwest Florida with expert guidance, quality door systems, and dependable installation. Whether you are replacing a worn entry door or upgrading your home’s envelope, our team is ready to help—request an exterior door consultation and quote to get started.