

Add a Deadbolt to Your Door for Better Entry Security
You can add a deadbolt to an existing wood or fiberglass door in about one to two hours with a compatible lockset, a 2-1/8-inch hole saw, a 1-inch edge bit, and careful measurements. Mark the correct backset, drill the face and edge holes, fit the bolt and cylinders, then install a reinforced strike plate with 3-inch screws driven into the wall framing.
A deadbolt is a practical upgrade for an exterior entry door. About 34% of burglars enter through the front door, and the lock is only as secure as its door, frame, and strike hardware. For the best results, choose an ANSI Grade 1 or Grade 2 deadbolt and reinforce the strike area, not just the lock on the door.
If you have a hurricane-rated, impact-rated, or hollow metal door, check the manufacturer’s instructions and local requirements before drilling. Modifying a rated door can affect its warranty or performance certification.
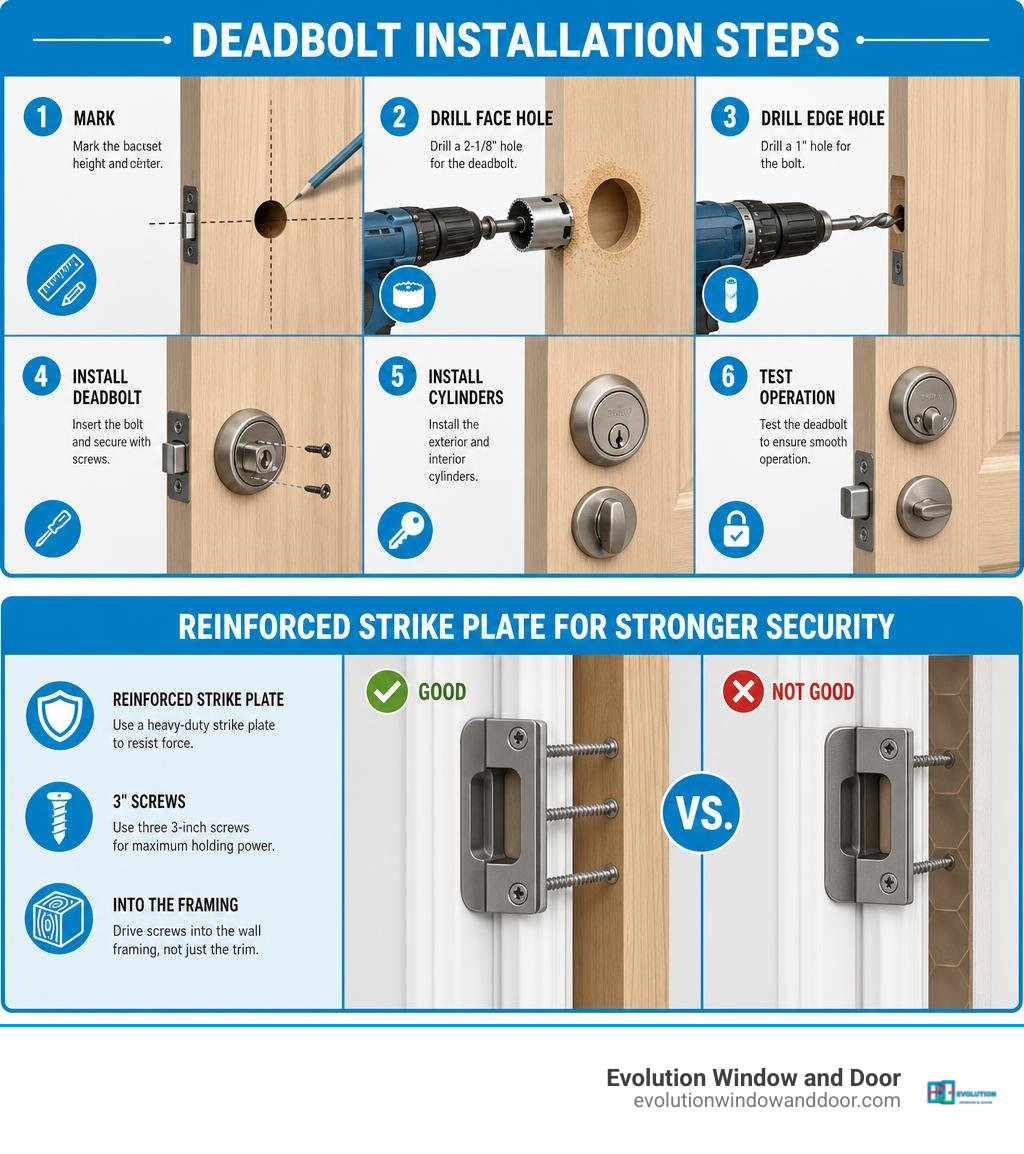
Why and When to Add Deadbolt to Door for Maximum Home Security
Standard spring-bolt doorknobs offer basic privacy, but they are not designed to stop determined physical force. A spring-latch can be slipped or shimmed with simple credit-card-style bypass tools because the beveled latch retracts under spring tension when pressed. By contrast, a deadbolt features a solid steel or hardened alloy bolt that extends a full inch into the door frame and locks solidly in place. It cannot be pushed back without turning the internal cylinder mechanism.
When upgrading your home security, hardware grading makes a major difference. The American National Standards Institute (ANSI) and Builders Hardware Manufacturers Association (BHMA) classify locks into three distinct tiers:
- ANSI/BHMA Grade 1: The highest level of residential and light-commercial security. A Grade 1 lock must withstand 800,000 continuous operation cycles, 10 heavy strikes from a battering ram test, and over 800 pounds of physical kick-in force.
- ANSI/BHMA Grade 2: Mid-tier residential security. Tested to 400,000 cycles and 5 strikes, handling roughly 400 to 500 pounds of force.
- ANSI/BHMA Grade 3: Basic builder-grade hardware. Tested to only 200,000 cycles and 2 strikes, often resisting only 150 pounds of force.
A standard residential door without reinforcement can be kicked open with as little as 100 to 150 pounds of direct impact. Because 55.7% of home burglaries involve forcible entry, upgrading hardware provides essential resistance. In fact, criminological studies show that about 60% of convicted burglars move on to another target entirely if they detect strong visible physical security measures. When upgrading interior and exterior doors, pairing a high-grade deadbolt with a reinforced strike plate ensures your entryway meets modern structural standards.
| Feature | Single-Cylinder Deadbolt | Double-Cylinder Deadbolt |
|---|---|---|
| Exterior Operation | Standard physical key | Standard physical key |
| Interior Operation | Thumbturn lever | Physical key only |
| Best Used For | Solid wood, fiberglass, or metal doors without adjacent glass | Doors with glass panes, decorative inserts, or nearby sidelights |
| Emergency Egress | Fast, intuitive exit without searching for keys | Slower exit; keys must be kept accessible nearby during emergencies |
| Building Code Compliance | Approved for virtually all standard residential exits | Restricted or banned in many residential jurisdictions due to fire safety codes |
Choosing Single-Cylinder vs. Double-Cylinder Deadbolts
Single-cylinder deadbolts are the most common choice for residential homes. They feature an exterior keyway and an interior thumbturn latch, allowing occupants to lock and unlock the entryway quickly without hunting for keys during an emergency evacuation.
Double-cylinder deadbolts require a key to operate both the inside and outside cylinders. These are engineered specifically for entry doors fitted with decorative glass inserts or positioned adjacent to sidelight windows. If an intruder smashes the glass, a double-cylinder lock prevents them from reaching inside to flick a thumbturn latch.
However, double-cylinder deadbolts present serious life safety considerations during fires or rapid evacuations. Many local building codes prohibit double-cylinder deadbolts on primary residential egress doors. If you opt for double-cylinder hardware, always check local safety codes and keep a key accessible near the door where household members can find it in an emergency.
Essential Preparation, Measurements, and Door Marking
Proper measurement ensures the lock mechanism throws smoothly without binding against the jamb. Before drilling any holes, verify the door dimensions and hardware specifications.
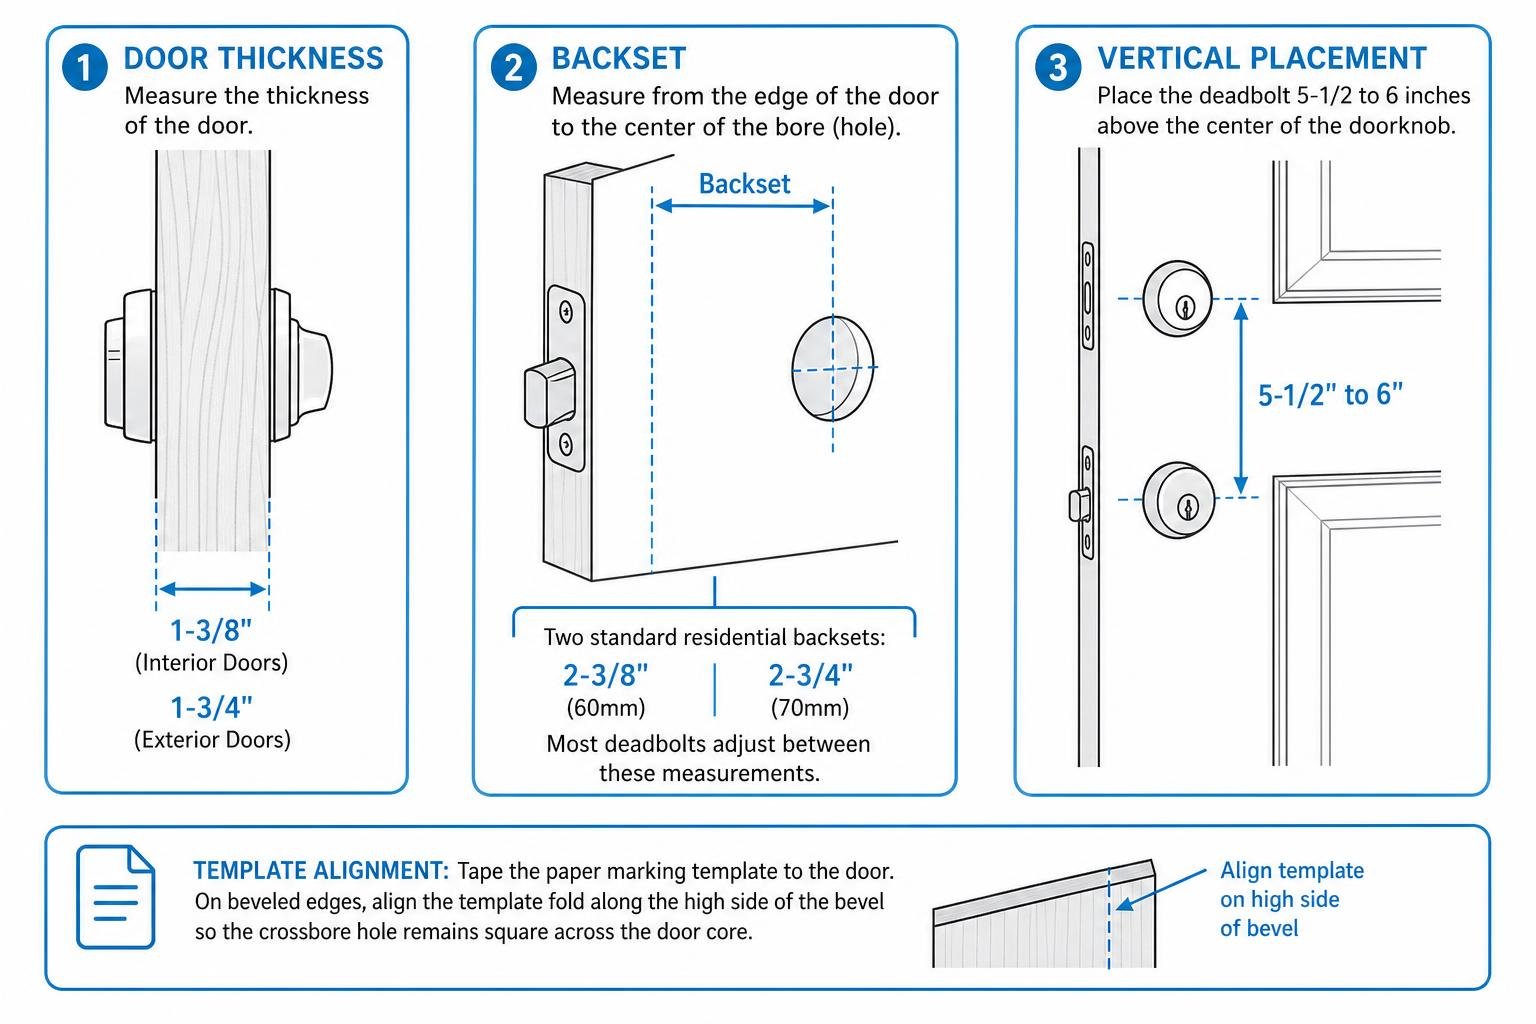
- Vertical Placement: The standard height for an auxiliary deadbolt is approximately 44 to 45 inches from the floor, which places it 5-1/2 to 6 inches directly above the center of the existing entry doorknob.
- Door Thickness: Standard exterior doors measure 1-3/4 inches thick, while interior doors are typically 1-3/8 inches. Most deadbolts include adjustable components or spacer rings to accommodate both sizes.
- Backset Measurement: The backset is the exact distance from the edge of the door to the deadbolt’s center bore. In North America, the two standard residential backset measurements are 2-3/8 inches (60mm) and 2-3/4 inches (70mm). Most modern deadbolts feature an adjustable bolt that switches between these dimensions by twisting the bolt casing 180 degrees.
- Template Alignment: Tape the paper marking template provided with your quality entry door hardware directly to the door. On doors with a beveled edge, always align the template fold along the high side of the bevel so your crossbore hole remains perfectly square across the door core.
Essential Tools and Materials to Add Deadbolt to Door
Gather these tools before starting to ensure a clean, professional finish:
- Variable-Speed Drill/Driver: For drilling and driving pilot holes.
- 2-1/8-Inch (54mm) Hole Saw: For cutting the main lock cylinder crossbore through the door face. Use a bi-metal hole saw if working on fiberglass or metal.
- 1-Inch (25mm) Spade Bit or Hole Saw: For boring the latch hole through the door edge.
- Wood Chisels (1/2-inch and 3/4-inch): For carving flush mortises for the latch faceplate and strike plate.
- Tape Measure, Speed Square, and Pencil: For precise marking.
- Utility Knife: For scoring wood grain to prevent tear-out when chiseling.
- Manual #2 Phillips Head Screwdriver: Essential for assembling lock cylinders without stripping the fine machine screws.
- Personal Protective Equipment: Safety glasses and work gloves.
For a broader perspective on traditional carpentry lock installation techniques, refer to A Step by Step Guide to Installing a Deadbolt Lock.
Step-by-Step Guide: Drilling, Mortising, and Hardware Installation
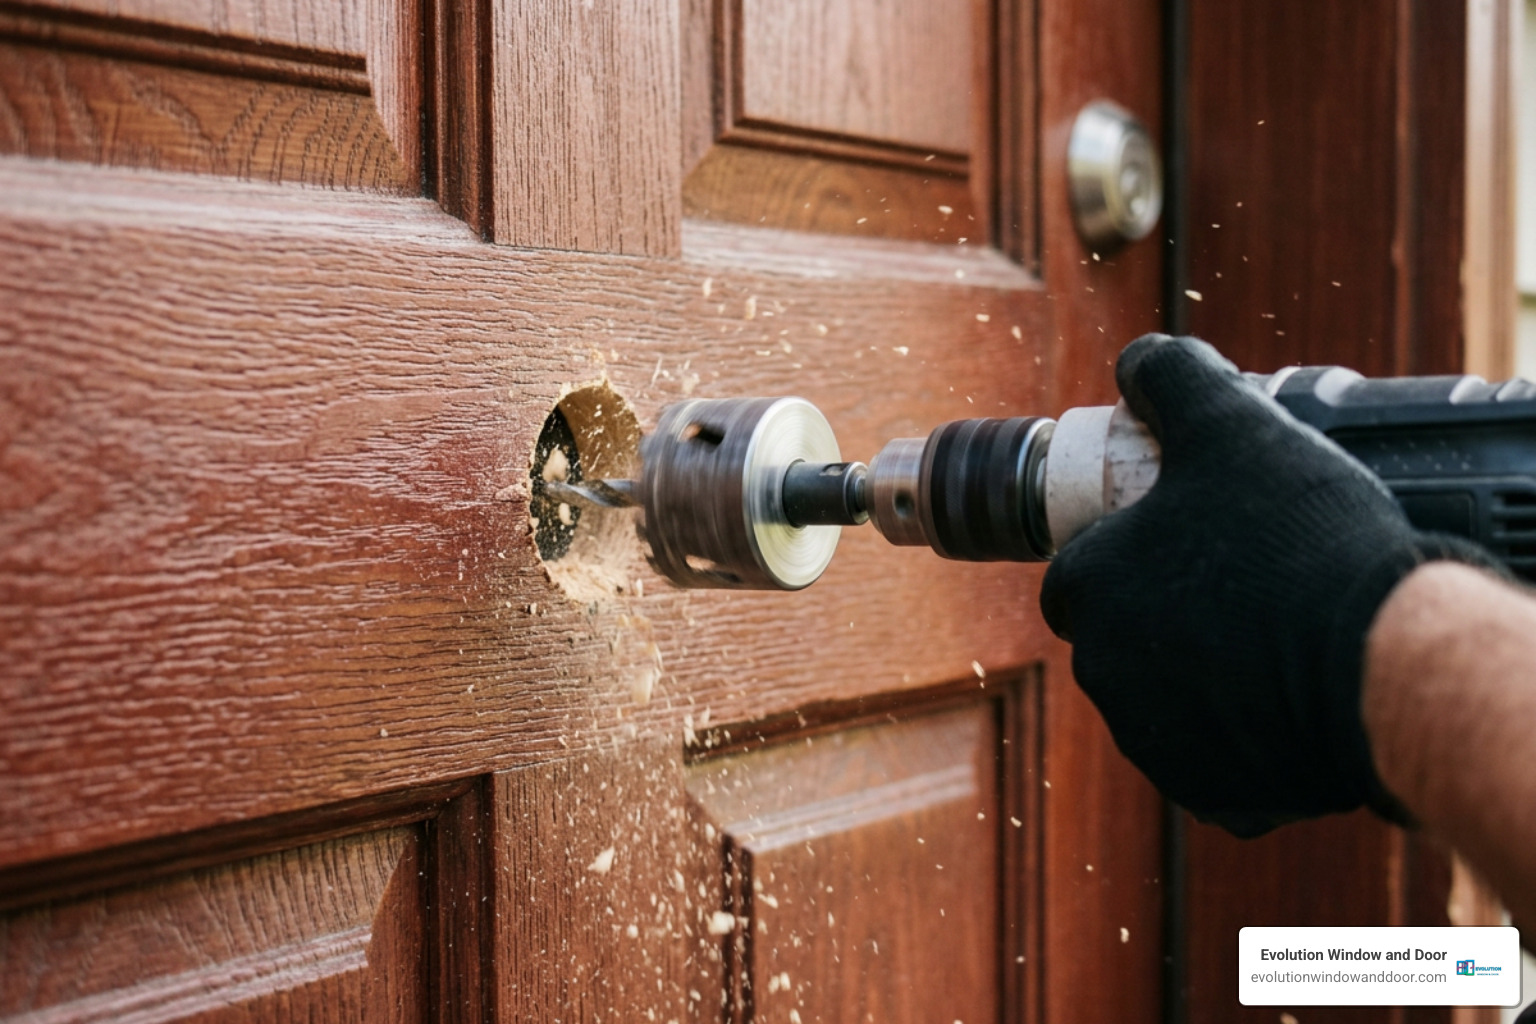
Taking your time during drilling prevents irreparable damage to your entryway. Follow these detailed steps to prep the slab and install the locking hardware cleanly on residential doors.
Boring the Face and Edge Holes Without Wood Splintering
Drilling a clean 2-1/8-inch crossbore requires steady technique to avoid “blowout”—a common issue where the hole saw pushes splintered chunks of wood through the opposite side of the door.
- Mark the Center Point: Use an awl or center punch to press an indentation into the door face at the exact intersection marked by your paper template (either 2-3/8 inches or 2-3/4 inches from the edge).
- Begin Drilling the Face Bore: Fit the 2-1/8-inch hole saw to your drill. Keep the drill level and perpendicular to the door face. Drill steadily until the small center pilot bit penetrates through the opposite side of the door slab.
- Reverse and Complete from the Opposite Side: Stop drilling immediately when the pilot bit breaks through. Move your drill to the opposite side of the door, align the hole saw pilot bit in the freshly made hole, and finish the cut from that side. This two-sided approach leaves crisp, splinter-free edges on both door faces.
- Bore the Edge Hole: Position the 1-inch spade bit or hole saw on the center mark along the door edge. Hold the drill level and bore into the door until the edge hole cleanly intersects the large 2-1/8-inch crossbore cavity. Remove any residual wood shavings from the opening.
Chiseling Mortises and Installing the Bolt Assembly
The bolt’s rectangular faceplate must sit completely flush with the door edge so the door closes smoothly against the frame without rubbing.
- Trace the Faceplate: Slide the latch bolt into the 1-inch edge hole, ensuring the “TOP” indicator stamped on the housing faces upward. Trace the perimeter of the rectangular metal faceplate with a sharp utility knife or fine pencil. Remove the bolt.
- Score the Perimeter: Use your utility knife to score deeply along the traced lines. Scoring cuts across the wood grain fibers and prevents the chisel from splitting wood outside your lines.
- Chisel the Mortise: Using a sharp wood chisel held at a 45-degree angle with the bevel side down, lightly tap out the wood inside the scored boundary to a depth of approximately 5/32 inch (the thickness of the faceplate). Clean the bottom of the mortise with the chisel held flat.
- Fasten the Bolt: Slide the bolt back into the edge hole. Check that it sits flush with the door edge. Fasten it securely with the provided mounting screws.
- Assemble the Cylinders: Insert the exterior cylinder through the 2-1/8-inch hole, passing the flat metal tailpiece horizontally through the center slot of the latch bolt. Position the interior thumbturn or interior cylinder assembly onto the tailpiece, align the mounting screw holes, and thread the machine screws into the housing.
- Tighten by Hand: Always tighten cylinder mounting screws with a manual #2 Phillips screwdriver rather than a power drill. Power drivers can overtighten the assembly, binding internal gears and stripping screw threads.
How to Add Deadbolt to Door Made of Steel or Hollow Metal
Installing a deadbolt into a hollow metal or steel utility door requires special steps because thin metal skins behave differently than solid wood.
- Use Bi-Metal Bits: Standard wood spade bits will dull instantly on metal. Always use a high-speed bi-metal hole saw lubricated with cutting oil when boring through steel skins.
- Prevent Skin Collapse: When you tighten cylinder assembly screws on a hollow metal door, the thin outer skins can compress inward, binding the lock. Insert an internal expanding cylindrical spacer sleeve or wood support block into the core around the crossbore before tightening the mounting screws.
- Drive-In Latches: For steel door edges without a factory-stamped mortise, choose a deadbolt kit equipped with a circular drive-in latch collar. A drive-in latch taps directly into a 1-inch edge hole without requiring edge mortising.
- Drilling the Metal Jamb: Metal door frames generally do not require a separate mortised strike plate. Drilling a clean 1-inch hole directly into the steel frame using a step drill bit or hole saw often provides strong, kick-resistant holding power.
For additional perspectives on metal door prep and hardware selection, explore How to Install a Deadbolt: Complete DIY Tutorial.
Reinforcing the Strike Plate and Testing Alignment
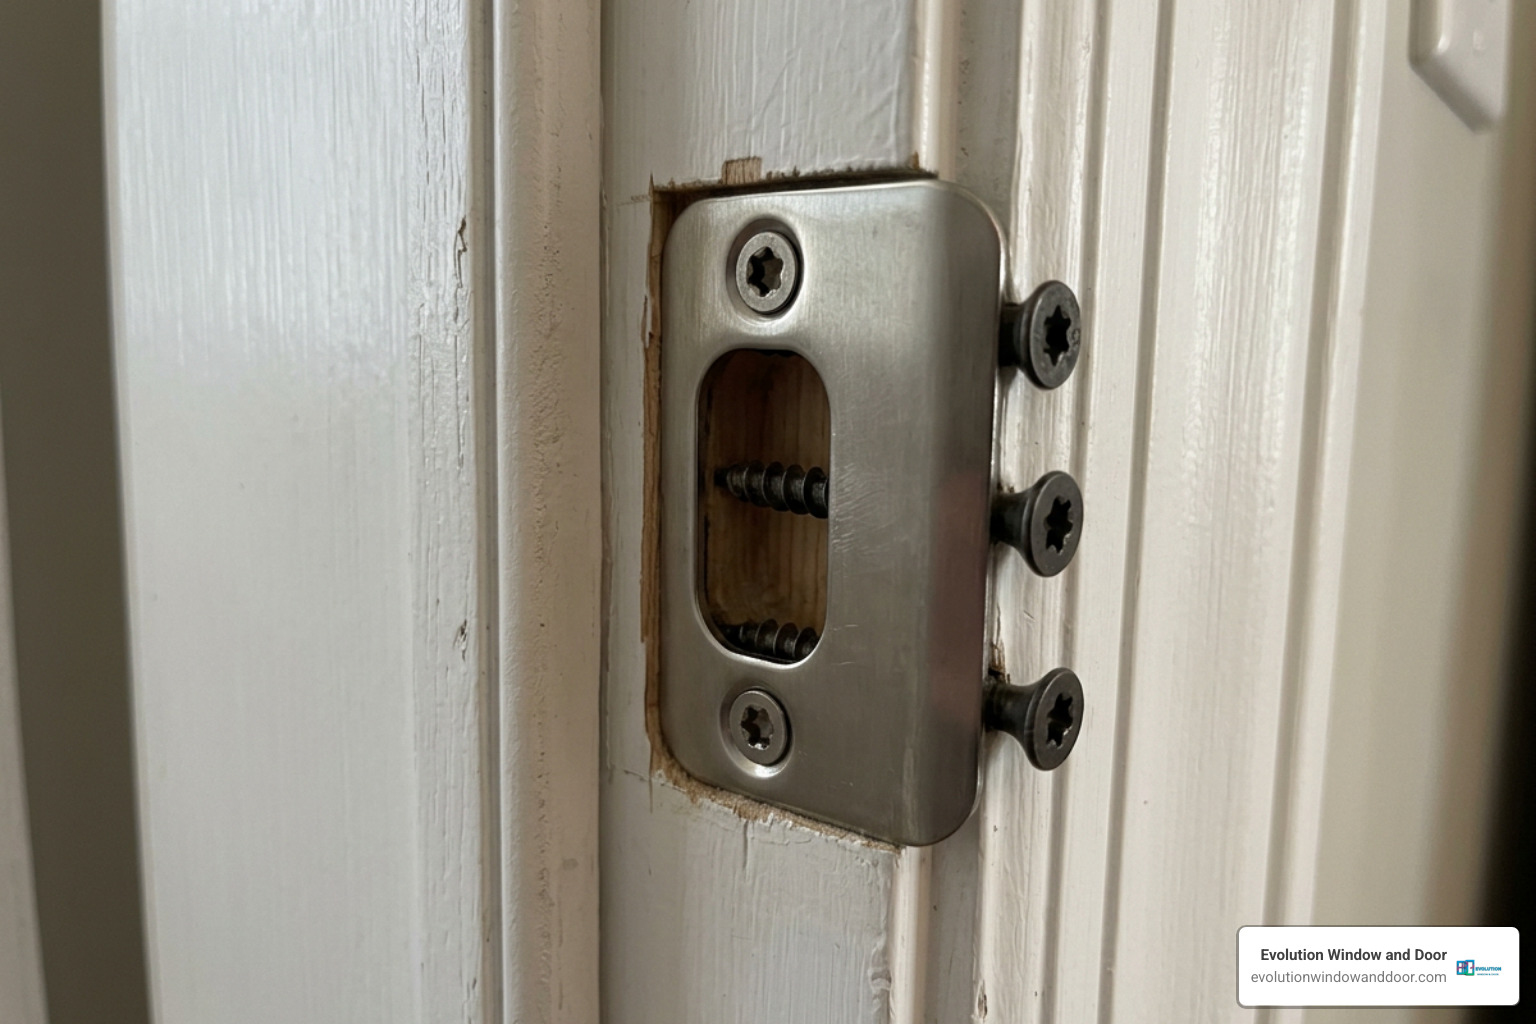
A high-grade deadbolt lock offers little protection if the strike plate is held in place by short 3/4-inch factory screws that only grip thin door trim. To resist kick-ins, you must anchor the strike plate deep into the solid 2×4 framing studs behind the jamb.
- Mark the Exact Strike Position: Close the door until it rests against the weatherstripping. To find the exact contact point, coat the tip of the extended deadbolt with dark lipstick, chalk, or a dry-erase marker. Retract the bolt, close the door firmly, and throw the deadbolt against the jamb. The lipstick leaves a precise outline of where the bolt meets the door frame.
- Bore the Jamb Cavity: Open the door and drill two overlapping 1-inch holes approximately 1-1/4 inches deep into the jamb at the lipstick mark to create a clean pocket for the bolt to fully extend.
- Mortise the Strike Plate: Hold the metal strike plate over the hole, trace its outline, score the edges, and chisel a shallow 7/32-inch mortise into the jamb so the plate sits flush.
- Install 3-Inch Structural Screws: Install the heavy-duty reinforcement strike box using 3-inch hardened steel screws driven through the jamb and deep into the rough framing stud. Apply a dab of wax or bar soap to the screw threads to ease insertion without splitting the framing wood.
- Test Open and Closed: Extend and retract the deadbolt several times with the door open. It should turn effortlessly. Next, close the door and operate the key and thumbturn. The bolt should throw freely into the jamb without scraping or forcing.
- Maintain with Dry Lubricant: If the keyway feels slightly stiff, apply a puff of dry powdered graphite or dry silicone lubricant into the cylinder. Never use wet spray oils or WD-40, which attract dust, gum up internal pin tumblers, and lead to sticking. If your entryway hardware needs refreshing, explore high-durability door parts and accessories designed to withstand daily use.
Frequently Asked Questions About Installing Deadbolts
Can you add a deadbolt to an impact-rated exterior door yourself?
Adding an aftermarket deadbolt to a certified hurricane impact-rated door requires caution. In coastal regions like Southwest Florida, exterior impact doors undergo rigorous laboratory testing to receive Florida Building Code (FBC) product approvals. Drilling unauthorized holes into an impact-rated fiberglass or steel slab can void manufacturer warranties, compromise internal structural reinforcements, and fail municipal building inspections. If you need to upgrade locking hardware on an impact door, consult certified professionals to preserve the door’s wind-load and impact certifications.
Why is my newly installed deadbolt sticking or difficult to turn?
A sticking deadbolt is almost always caused by misalignment between the bolt and the strike plate hole. If the door sags slightly on its hinges or if thick weatherstripping pushes the door outward, the bolt rubs against the metal strike edge. You can correct frame sag by replacing the center screw in the top door hinge with a 3-inch screw to pull the jamb tighter to the wall framing. If the bolt still binds, use a metal hand file to slightly widen the strike plate opening where contact occurs.
What is the standard height and backset for adding a deadbolt?
The standard height for a residential deadbolt is 44 to 45 inches from the finished floor, or roughly 5-1/2 to 6 inches above the center of the primary entry doorknob. Standard backset measurements are either 2-3/8 inches (common in residential construction) or 2-3/4 inches (common in commercial or thicker exterior doors). Always measure your existing door before purchasing hardware to verify backset compatibility.
Conclusion
Installing an ANSI Grade 1 or Grade 2 deadbolt lock is one of the most cost-effective DIY home security upgrades you can complete. By measuring carefully, drilling from both sides to avoid blowout, and anchoring a reinforced strike plate into the wall framing with 3-inch structural screws, you build a reliable physical barrier against forced entry.
If your entryways require complete replacement, energy upgrades, or hurricane-rated structural impact performance, professional guidance ensures lasting peace of mind. At Evolution Window & Door, we help homeowners across Southwest Florida—including Cape Coral, Fort Myers, Sanibel, Port Charlotte, Punta Gorda, Sarasota, Bonita Springs, and Naples—protect their homes with precision-crafted, code-compliant impact doors and windows built for maximum strength and style.


