

The Fast Way to Choose and Install a Replacement Screen for Window Openings
If you need a replacement screen for window frames in your home, you have two simple paths: rescreen an existing frame or order a custom-sized replacement unit.
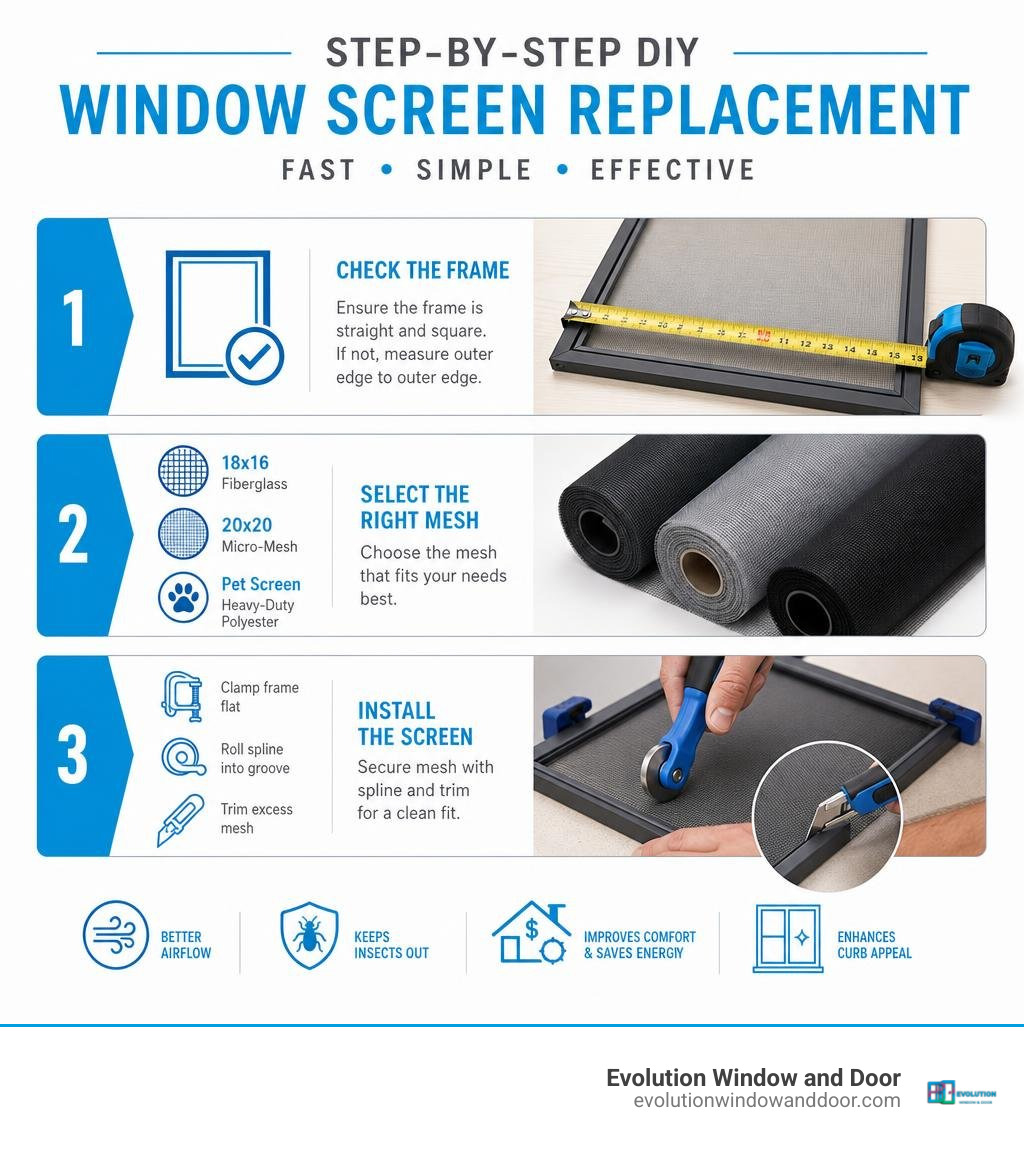
Here is the quick process to get it done right:
- Check the Frame: If your aluminum frame is straight and square, you only need new mesh roll and vinyl spline. If the frame is bent, cracked, or missing, measure outer edge to outer edge (down to the nearest 1/16-inch) for a pre-assembled replacement.
- Select the Right Mesh: Standard 18×16 fiberglass works best for everyday airflow. Upgrade to 20×20 micro-mesh to block tiny biting no-see-ums, or choose heavy-duty polyester pet screen (7x stronger than standard mesh) if you have cats or dogs.
- Install the Screen: Clamp your frame flat, lay the mesh across the channel, and use a dual-wheel spline roller to press the spline cord firmly into the groove. Trim the excess mesh with a utility knife.
Torn, sagging, or sun-rotted screens ruin your home’s curb appeal and let pests inside when you want fresh air. In hot, coastal climates, intense UV rays and salty breezes break down standard fiberglass mesh within three to five years.
Replacing your window screens is one of the most cost-effective DIY projects you can tackle this weekend. With basic hand tools and inexpensive materials, you can restore natural airflow, lower your energy bills, and keep insects outside where they belong.
Choosing the Right Replacement Screen for Window Mesh Materials
Picking the right screening material is the most important decision you will make for your project. Screen mesh is no longer a one-size-fits-all product. Depending on your home’s exposure to sun, coastal air, pets, and insects, certain materials perform significantly better than others.
Pairing high-grade screening with stylish quality windows ensures your home stays comfortable, well-ventilated, and protected from the elements.
| Mesh Material | Durability Rating | Airflow & Visibility | Relative Cost (per 100 sq ft) | Best Application |
|---|---|---|---|---|
| Standard Fiberglass | Moderate (3–5 years) | Excellent visibility; high airflow | $20 – $40 | Budget-friendly residential window repairs |
| Aluminum Wire | High (corrosion-prone near salt) | Crisp visibility; rigid structure | $35 – $60 | Inland homes seeking sag-resistant metal frames |
| Vinyl-Coated Polyester | Extremely High (7x stronger) | Slightly reduced light transmission | $50 – $90 | Homes with energetic dogs, cats, or heavy wind |
| Stainless Steel | Superior (corrosion & cut proof) | High visibility; maximum security | $80 – $130+ | High-traffic openings, coastal storm durability |
| Bronze / Copper | Superior (forms green patina) | Classic architectural look | $100 – $160+ | Historic preservation, seaside antique aesthetics |
Specialty Mesh: Pet Screens, Solar Screens, and No-See-Um Mesh
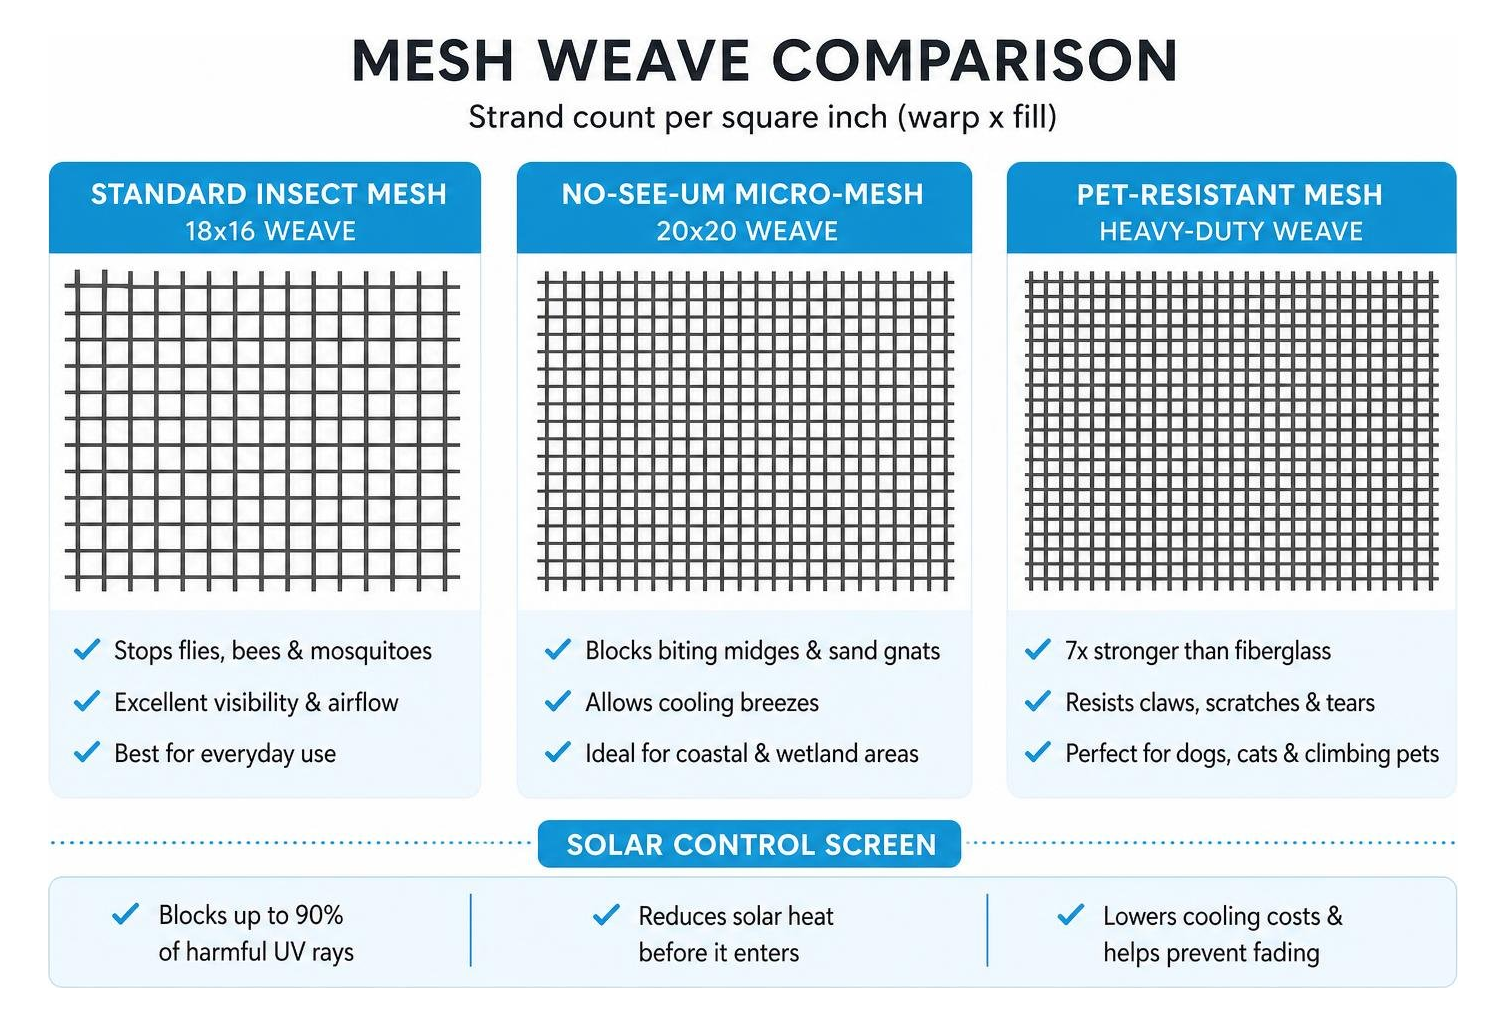
Standard insect mesh features an 18×16 weave (18 warp strands by 16 fill strands per square inch). While this weave easily stops flies, bees, and mosquitoes, it falls short in special environments:
- No-See-Um Micro-Mesh (20×20 Weave): Coastal wetlands and tidal waterways in communities like Pine Island, Sanibel, Cape Coral, and Naples are notorious for biting midges and sand gnats. A dense 20×20 micro-weave creates an impenetrable barrier against tiny insects while still allowing cooling ocean breezes into your living space.
- Solar Control Screens: Solar mesh is engineered to block up to 90% of harmful UV rays and reduce solar heat gain before it penetrates the window glass. This dramatically lowers indoor cooling costs during sweltering summer afternoons and shields interior carpets and draperies from sun fading.
- Pet-Resistant Screens: Made from heavy-duty, vinyl-coated polyester yarn, pet mesh is roughly 7 times stronger than traditional fiberglass. It easily withstands clawing, scratching, and climbing from dogs and cats without tearing or stretching out of shape.
Frame Profiles, Thicknesses, and Color Finishes
A screen frame must fit snugly within the window channel without bowing. Screen frames are crafted from roll-formed or extruded aluminum that resists moisture and rot.
Standard residential frame thicknesses include:
- 5/16-inch depth: Standard for many vinyl and aluminum single-hung windows.
- 3/8-inch depth: Common across modern horizontal sliders and storm windows.
- 7/16-inch depth: Heavy-duty profile used for larger window openings, casements, and commercial window assemblies.
The face width of these frames typically measures 3/4-inch or 1-inch. When choosing a finish, match your window’s existing frame finish. The most popular factory-applied powder-coat finishes are White, Bronze (dark architectural brown), Tan/Almond, Black, and raw Mill Finish (silver aluminum).
Measuring Dimensions and Selecting Frame Hardware
Because window manufacturers do not use standardized screen sizes, precision is critical when you order a pre-assembled frame. Window screens require measurements down to the nearest 1/16-inch to seat properly inside the perimeter track.
If you are evaluating custom screens as part of choosing the right window style for your home, getting the frame dimensions right will save you significant installation time.
Single-Hung vs. Double-Hung Window Configurations for Replacement Screen for Window
The window style dictates whether you need a full-height screen or a half screen:
- Single-Hung Windows: Because only the bottom sash slides upward while the upper sash remains fixed, single-hung windows utilize half screens. These cover only the lower half of the frame opening.
- Double-Hung Windows: Double-hung windows allow both the upper and lower sashes to operate independently. This setup allows cool air to enter through the bottom sash while warm indoor air vents out through the top sash. Double-hung units can use either a full screen covering the entire window perimeter or an exterior-mounted half screen that can be positioned across either operating zone.
Matching Tension Springs, Plunger Bolts, and Latches
Screen retention hardware keeps the aluminum frame firmly in place against outdoor wind pressure while allowing quick removal for cleaning. Inspect your existing channels and select the right parts and accessories for your window model:
- Leaf Tension Springs: Flat, curved stainless steel strips installed inside the top or side frame channel. They push against the window frame track, holding the opposite side firmly in place.
- Pull Tabs: Heavy-duty plastic or metal tabs seated in the spline channel. They give your fingers leverage to compress the leaf springs during removal.
- Plunger Bolts: Spring-loaded metal or nylon pins mounted through holes drilled into the screen frame. The pins snap into pre-drilled holes in the window jamb.
- Ram Horn Clips: Curved tension clips designed for single-hung windows featuring downward-facing retention flanges.
- Butterfly / Slide Latches: Small sliding tabs positioned on the sides of the frame, commonly used on various casement windows.
- Swivel Latches: Plastic or metal latches that pivot into dedicated vertical slots in the window frame.
Step-by-Step Screen Installation and Repair Methods
Rescreening an existing window frame is a fast DIY project. You will need a roll of replacement mesh, a roll of round vinyl spline, a flathead screwdriver, a utility knife, and a dual-wheel spline rolling tool.
Installing a Replacement Screen for Window Frames
Follow this step-by-step process to rescreen your window frame:
- Remove the Old Spline and Mesh: Lay the screen frame flat on a sturdy workbench. Insert the tip of a flathead screwdriver under the old vinyl spline cord, lift it out of the channel, and pull the old mesh away from the frame.
- Inspect and Clean the Frame: Wipe dirt and pollen out of the spline channel. Check that all four plastic corner keys are intact and that the frame remains square. Secure the frame edges to your work table using clamps or painter’s tape to prevent the frame from bowing inward during tensioning.
- Position the New Mesh: Roll your new mesh over the frame, allowing roughly 1.5 to 2 inches of excess material to overhang on all four sides.
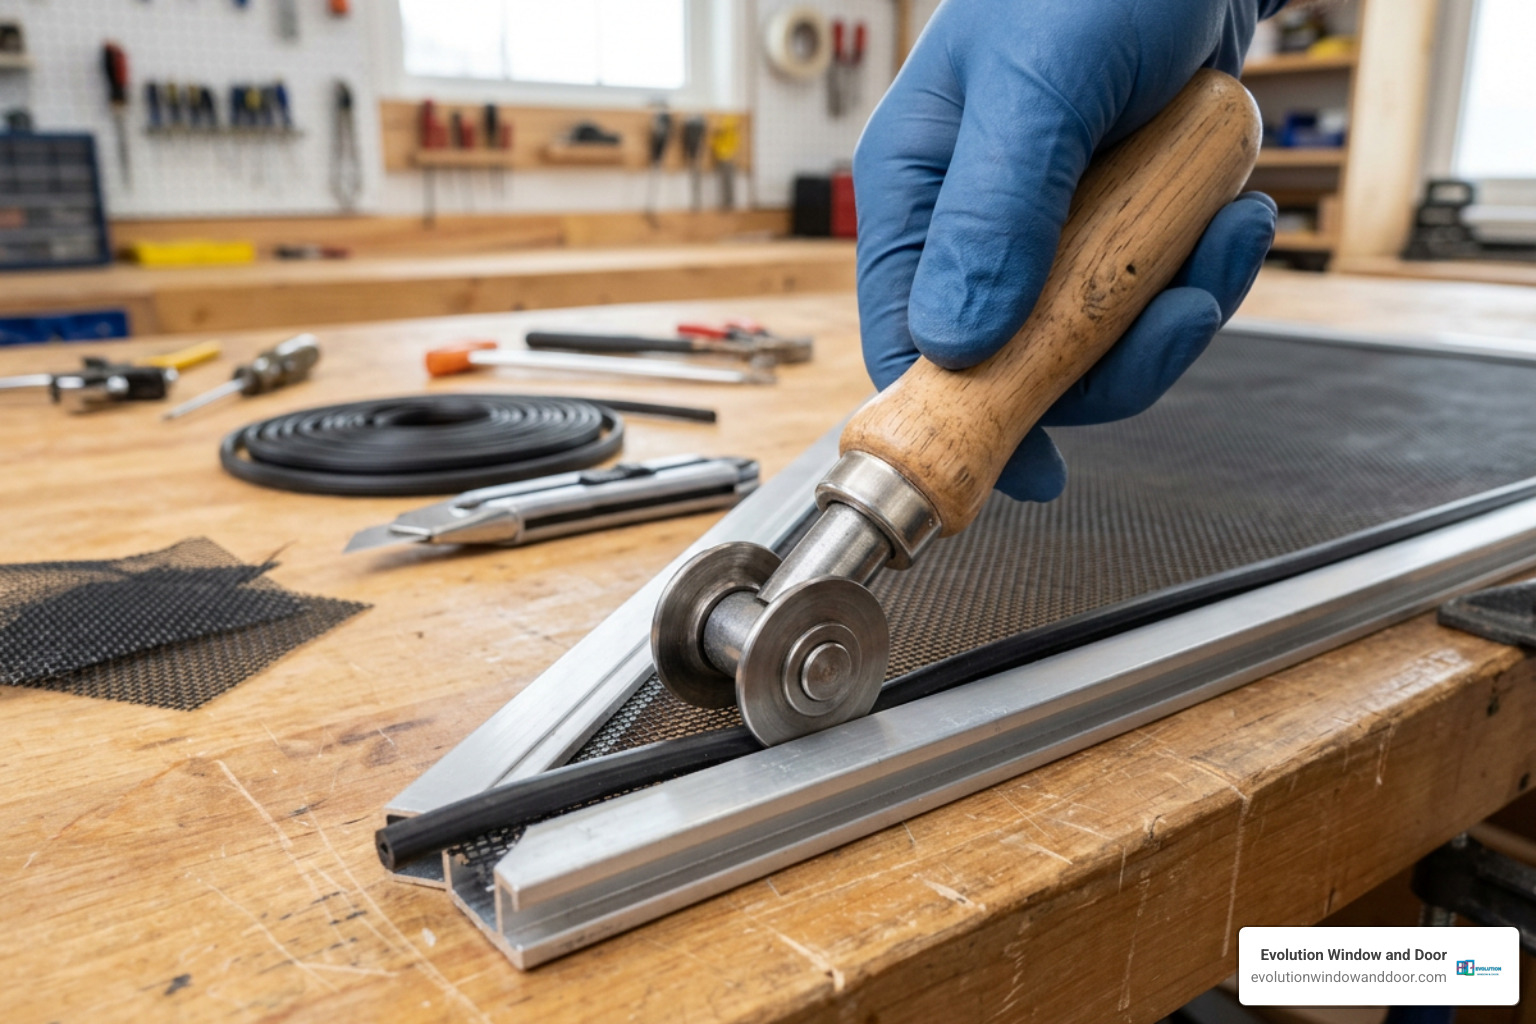
- Seat the Mesh into the Groove: Use the convex (rounded) wheel of your spline tool to gently press the mesh down into the channel groove.
- Roll in the Spline Cord: Position your vinyl spline at a corner. Using the concave (grooved) wheel of the spline roller, push the spline into the channel over the mesh using steady, smooth strokes. Hold the mesh taut with your opposite hand to prevent wrinkles, but avoid pulling so hard that the aluminum frame bows inward. Insert your pull tabs under the spline along the designated side before rolling past them.
- Trim the Excess Material: Hold a sharp utility knife at a 45-degree angle pointing away from the mesh, riding against the outer lip of the frame. Slice away the excess screening material along the perimeter.
If you are also refreshing other entry points around your home, you can find the perfect sliding screen door for your home or discover how to keep bugs out with stylish retractable screen doors. For more detailed installation tips, review A Simple Guide to Easy DIY Window Screen Installation.
Screen Mesh Repair vs. Full Frame Replacement
Before investing time into rolling new mesh, determine whether your existing frame is worth saving:
- Rescreen the Existing Frame If: The aluminum frame sits completely flat, corner joints fit tightly without wobbling, and the channel walls are free from crushing or deep corrosion. DIY rescreening materials generally cost between $10 and $25 per window.
- Order a Fully Assembled Replacement Screen If: The frame is bent, twisted, or missing entirely, the corner keys have snapped inside the frame, or the aluminum has oxidized heavily from coastal salt air. A custom-manufactured, fully assembled screen frame saves installation time and guarantees structural rigidity.
If your window frames themselves are drafty, fogged, or deteriorating, simple screen repairs may only be a temporary cosmetic fix. Recognizing the signs it’s time to replace your doors or windows helps you make the right long-term investment in your home.
Long-Term Cleaning and Seasonal Maintenance
Window screens collect dust, airborne dirt, and salt crystals that can restrict airflow and accelerate mesh degradation. A simple maintenance routine performed twice a year will extend the life of your screens to a decade or more.
- Remove and Dust: Use the pull tabs to gently compress the leaf springs, tilt the screen inward, and remove it from the window frame. Vacuum both sides with a soft upholstery brush attachment to lift away loose dust, spider webs, and pollen.
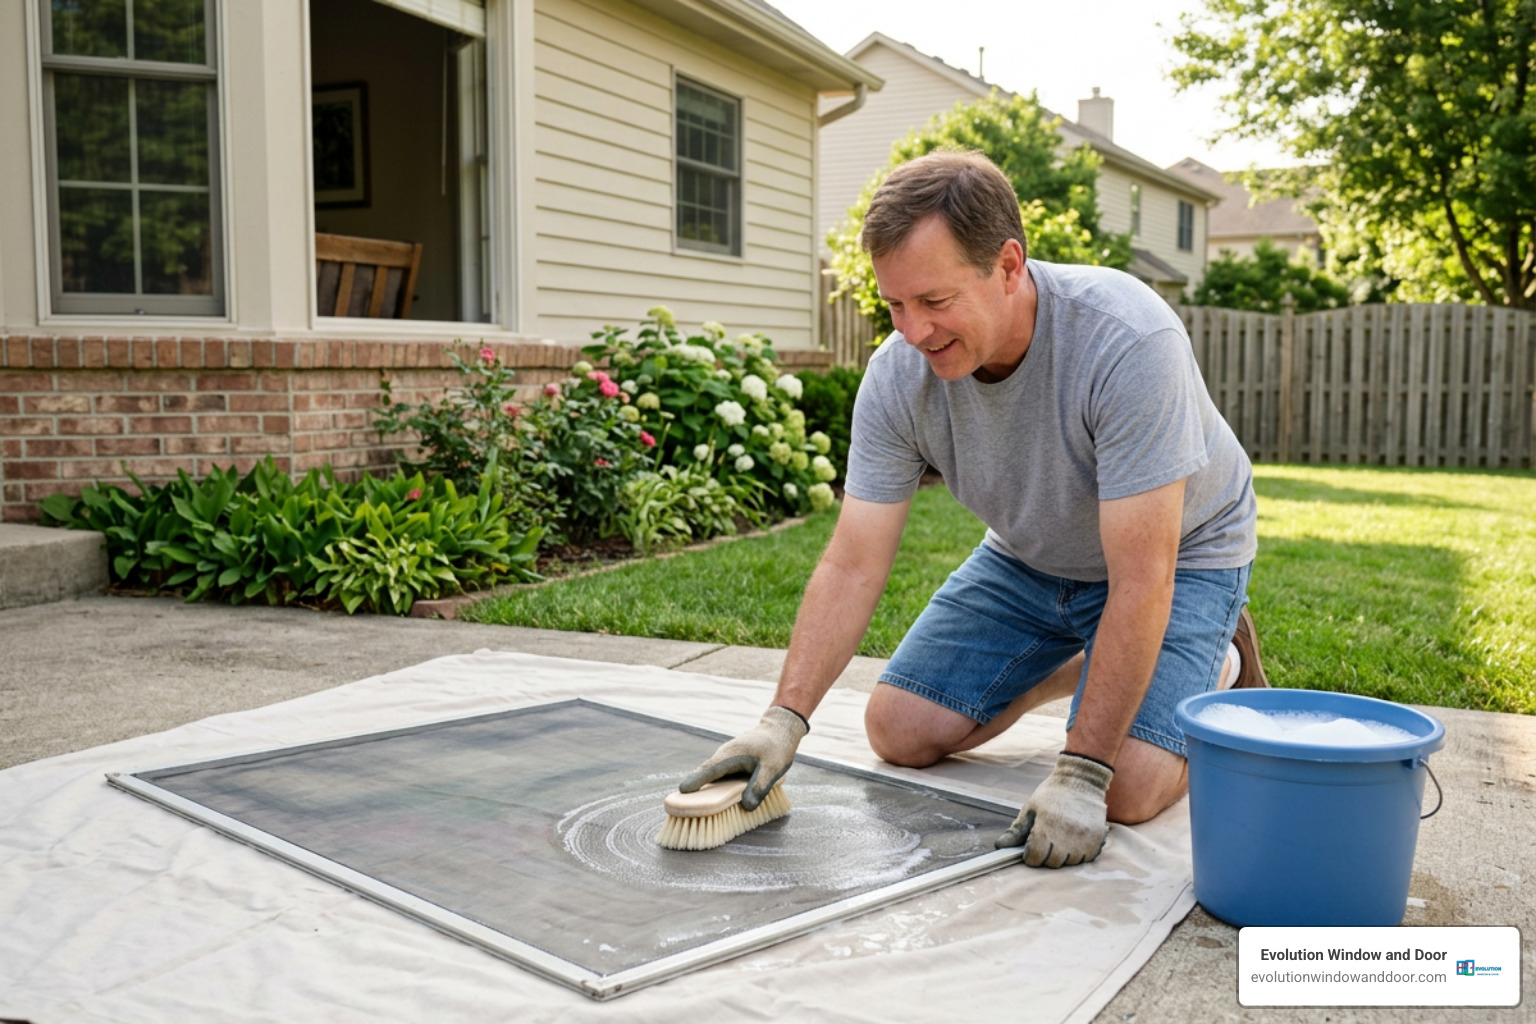
- Wash with Mild Soap: Lay the screen on a clean flat surface outside. Mix a few drops of mild liquid dish soap into a bucket of warm water. Gently scrub the mesh and aluminum frame using a soft-bristle brush or microfiber sponge. Avoid harsh chemical cleaners or stiff wire brushes, which can strip the protective vinyl coating off fiberglass mesh.
- Rinse and Air Dry: Spray down the screen with a gentle garden hose stream. Never use a high-pressure washer, as the intense water pressure will stretch and warp the screen fabric. Lean the screens upright against a wall in the shade to dry completely before snapping them back into place.
- Seasonal Storage: If you close up your home for extended periods or live in an area prone to severe tropical weather, consider storing clean screens indoors in an upright vertical rack. Storing screens protects the mesh from wind-driven debris and UV exposure.
Frequently Asked Questions About Window Screen Replacement
Can I rescreen a window without replacing the frame?
Yes. As long as your existing aluminum frame is structurally sound, square, and unbent, you only need to purchase replacement screen fabric and the appropriate diameter vinyl spline cord. Simply remove the old spline, position the new mesh, and roll the cord into the channel.
What is the difference between standard mesh and no-see-um screen mesh?
Standard insect screens use an 18×16 weave designed for general insect protection and maximum airflow. No-see-um mesh features a tighter 20×20 weave specifically engineered to stop biting gnats, midges, and sand fleas common in coastal regions, while still providing reliable ventilation.
How do leaf springs and pull tabs work on window screens?
Leaf springs are flexible, curved pieces of stainless steel installed in the upper or side channel of the screen frame. When you push the screen into the window track, the springs compress and then push back outward to create a tight perimeter seal. Pull tabs give you a secure handhold to compress the springs and release the frame from the track when it is time for cleaning.
Conclusion
Maintaining clean, durable window screens lets you enjoy natural breezes, keep out insects, and protect your home’s interior from excessive solar heat. Whether you choose to roll new mesh into your existing frames or order custom-built screen units, measuring accurately and selecting the right material ensures great results.
If you are upgrading your home with new energy-efficient windows or exploring full-service installation services, our team provides expert guidance tailored to coastal Florida home standards.
Visit Evolution Window and Door at https://evolutionwindowanddoor.com/ to schedule a pressure-free consultation with our local specialists in Cape Coral, Fort Myers, Sanibel, Naples, and surrounding communities.


