

Essential Tools and Preparation for Window Screen Installation
Before we dive into cutting frames or rolling spline, having the right setup is key. Gathering the proper tools beforehand saves time and prevents tears in your new mesh.
Here is a list of basic tools and materials required for a successful window screen installation:
- Rigid Metal Tape Measure: Flexible cloth tapes stretch and yield inaccurate dimensions. Always use a steel tape measure.
- Spline Roller: A dual-wheel tool with a convex (rounded) wheel for pre-creasing mesh or setting thick screen materials and a concave (grooved) wheel for rolling the spline cord into place.
- Utility Knife: Essential for trimming excess screen mesh cleanly along the frame groove.
- Aluminum Frame Stock & Corner Connectors: Standard metal channels that form the rectangular frame outline.
- Vinyl Spline: A flexible rubber or vinyl cord that wedges the mesh securely into the frame channel.
- Screening Mesh: Available in various materials tailored to your home’s specific lighting, pet, or ventilation needs.
If you are replacing broken clips, worn pull tabs, or oxidized frame corners, stock up on high-quality hardware components from our Parts & Accessories collection to ensure a seamless fit.
Choosing the Right Screen Mesh Material
Selecting screen mesh involves choosing the material best suited for your specific home environment. Here in Florida, screening does more than just block bugs; it plays a role in managing solar heat, withstanding tropical humidity, and enduring pet activity.
- Standard Charcoal Fiberglass Mesh: The standard DIY choice across the industry. It is rust-proof, budget-friendly, and easy to handle because it does not crease. Black or charcoal screening offers superior glare reduction and clear outdoor visibility compared to lighter silver meshes.
- Aluminum Screening: Rigid and sag-resistant, metal mesh holds up well over time. However, it requires careful handling during installation because it creases easily if bent incorrectly.
- Pet-Resistant Screening: Made from heavy-duty vinyl-coated polyester, pet-resistant mesh is up to seven times stronger than standard fiberglass. It resists tears from claws and heavy impacts from pets and children.
- SunScreen® / Solar Screening: Formulated to block up to 70% of solar heat and intense UV glare while maintaining air circulation, making it ideal for sun-exposed rooms.
- UltraVue® & BetterVue® Mesh: Designed with finer yarns and a tighter weave. UltraVue® provides up to 25% better visibility and increased ventilation compared to standard fiberglass, while BetterVue® offers up to a 20% visibility boost.
- AllergyGuard® Screening: Incorporates a three-layer nanotechnology coating designed to filter out microscopic dust particles, pollen, and airborne allergens before they enter your home.
| Screen Mesh Type | Key Material & Features | Primary Benefit | Ideal Application |
|---|---|---|---|
| Fiberglass | Flexible woven glass fibers | Easy installation, rust-proof, affordable | Standard window openings |
| Aluminum | Woven metal wire | Durable, sag-resistant | High-wind areas, traditional frames |
| Pet-Resistant | Vinyl-coated polyester | 7x stronger than standard mesh | Lower sashes, homes with pets |
| Solar / SunScreen® | Heavy-duty micro-weave | Blocks 70% of solar heat | South/West facing window walls |
| UltraVue® / BetterVue® | Fine-filament synthetic weave | 20-25% improved clarity & airflow | Scenic view windows & main living spaces |
| AllergyGuard® | Nanotechnology micro-mesh | Filters pollen, spores, & fine dust | Bedroom windows for allergy sufferers |
How to Measure Frames and Calculate Frame Cuts
Accurate measurement is critical for custom screen fitting. Even a slight miscalculation can cause a frame to bind in the track or fall out during high winds.
- Measure the Opening: Using a rigid metal tape measure, measure the window frame width and height in three separate places (top, middle, bottom for height; left, center, right for width). Record the smallest measurement to the nearest 1/16 of an inch.
- Apply the 1-1/2-Inch Corner Deduction Rule: Standard square cut corner connectors add 3/4 inch of length and width to each side of the frame assembly. To calculate your actual metal frame cut length, subtract 1-1/2 inches from your overall measured width and height. For example, if your window opening measures 24 inches wide by 36 inches high, cut two horizontal aluminum pieces to 22-1/2 inches and two vertical pieces to 34-1/2 inches.
- Account for Tension Hardware: If your screen frame uses top-tension springs on an interior track, subtract an extra 1/8 inch from the vertical frame cut length to allow the springs to compress smoothly.
- Plan for a Mid-Frame Cross Brace: For any window screen frame taller than 3 feet (36 inches), include a horizontal cross brace across the center. As spline is rolled under high tension, it pulls the long side rails inward—a distortion known as “hourglassing.” A cross brace keeps the side rails straight and square.
For detailed custom window specs, reviewing standard architectural resources like general insect screen specifications provides valuable insights on frame clearances.
Master Every Window Screen Installation Method
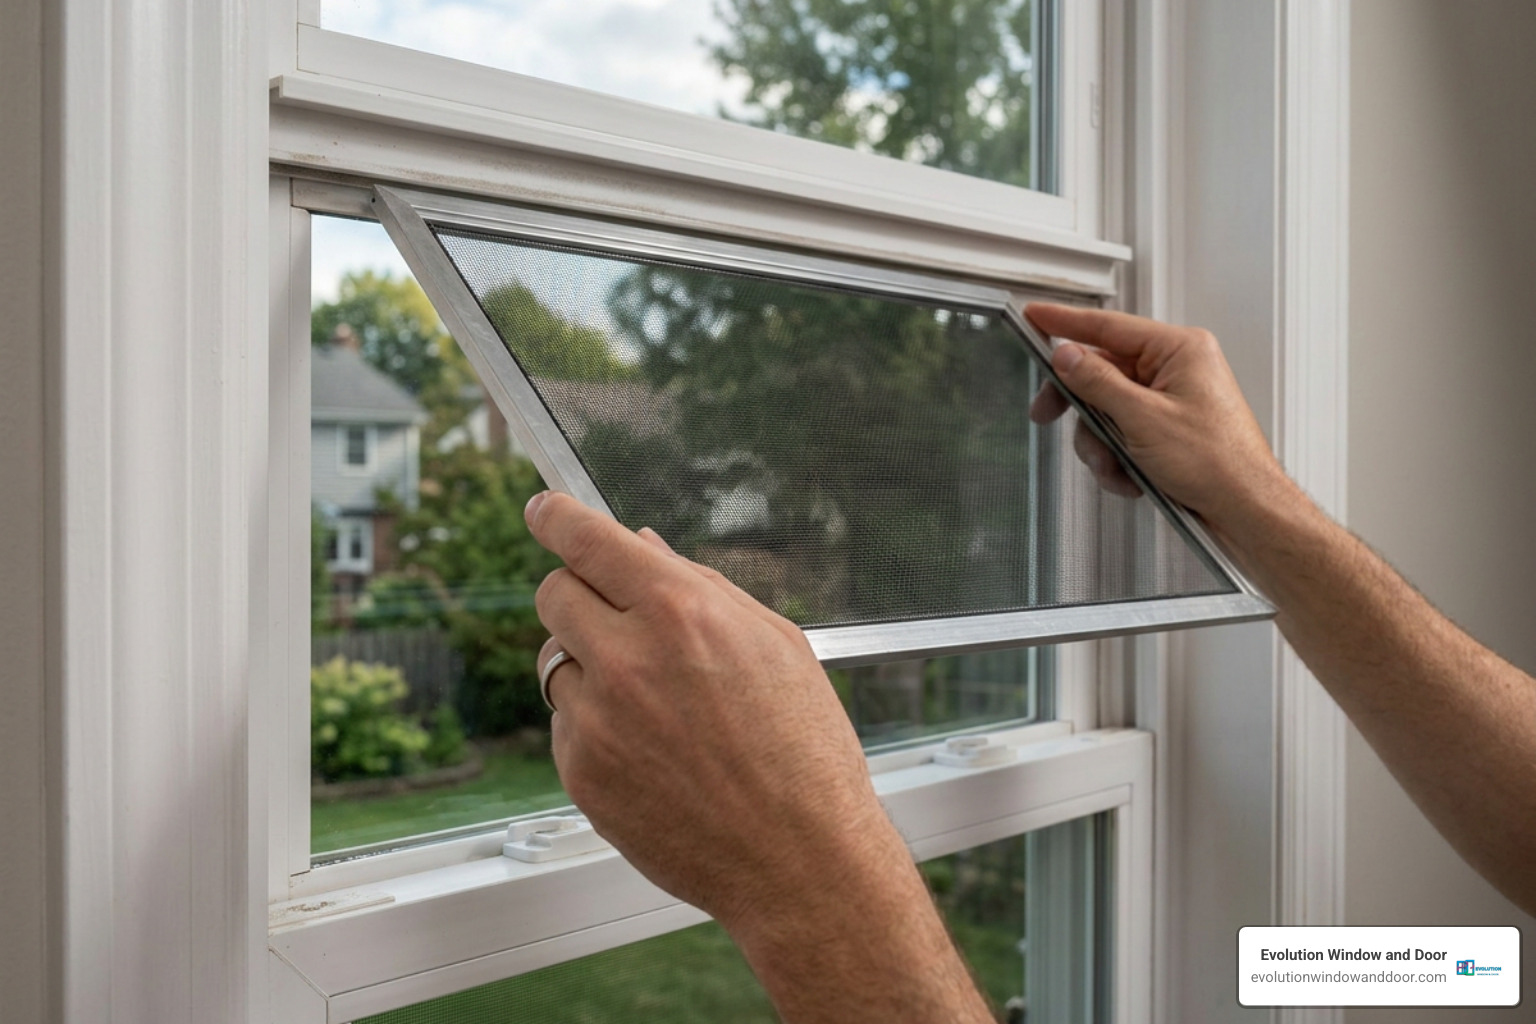
Different operating styles of windows require different retention mechanisms to hold screens securely in place against weather and wind.
- Single-Hung and Double-Hung Windows: Feature sashes that slide vertically. These units typically hold screens in exterior tracks using spring clips, plunger pins, or slide latches.
- Casement and Awning Windows: Since casement sashes crank outward, their screens mount on the interior room side of the window frame.
- Sliding (Glider) Windows: Use horizontal tracks where the screen slides alongside the active window sash.
Installing Clips, Tabs, and Spring-Tension Systems
Matching the proper attachment hardware to your window frame design keeps your screen firmly seated without rattling.
- Clip and Tab Systems: Position the screen frame so the rubber or vinyl spline channel faces toward the outside exterior. Slide the top edge into the upper window frame track first, compress it upward, then pivot the lower edge into the bottom frame sill before engaging the turn clips or plastic pull tabs.
- Plunger Pins: Metal pins mounted inside pre-drilled holes in the screen frame spring into matching pilot holes drilled inside the window jamb. Pull back on the spring-loaded caps, position the screen, and release the caps so the pins snap securely into place.
- Spring-Tension Frames: Equipped with flat stainless steel leaf springs mounted on one side or top edge of the screen frame. Compress the spring-loaded side into the deeper window channel recess first, align the opposite side with the shallow channel, and slowly release pressure. The outward spring tension locks the frame in place without external mounting screws.
Step-by-Step Retractable Window Screen Installation
Retractable screens roll away into an aluminum cassette housing when not in use. They offer unobstructed glass views and protect the mesh from weather degradation.
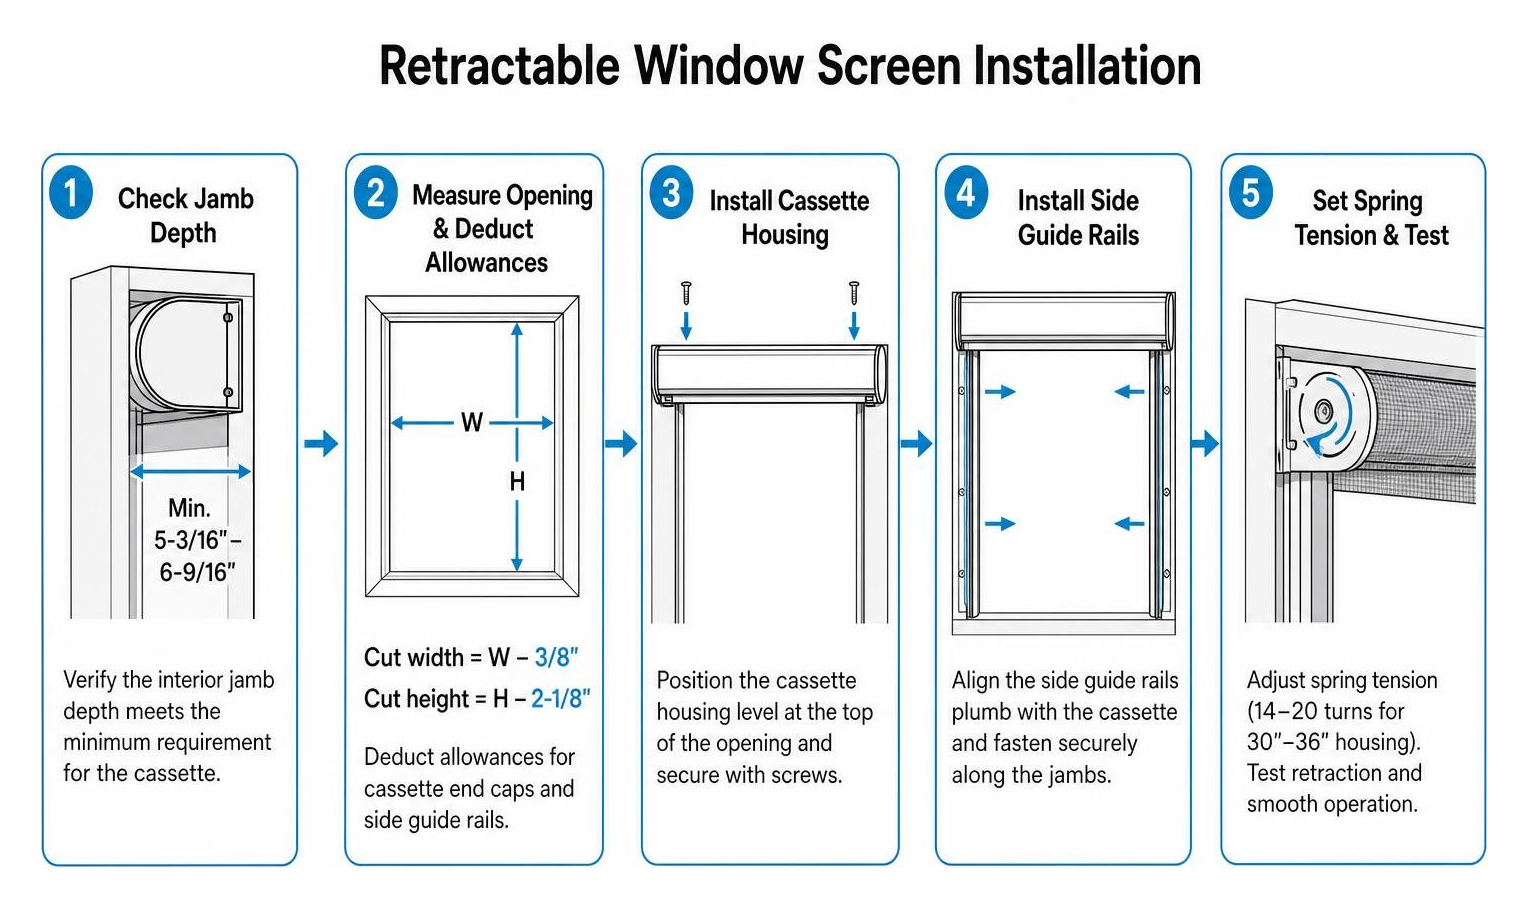
When ordering or installing a retractable unit:
- Check Jamb Depth: Retractable cassettes require a minimum interior frame jamb depth—typically 5-3/16 inches to 6-9/16 inches depending on whether you have double-hung or casement sashes.
- Deduct Cutting Allowances: When custom-cutting a retractable screen kit to fit a recessed opening, subtract 3/8 inch (9.5 mm) from the measured width for the cassette end caps, and subtract 2-1/8 inches (54 mm) from the height for the side guide rails.
- Calibrate Spring Tension: Internal cassette springs must be properly tensioned based on housing length (e.g., a 30-to-36-inch housing typically requires 14 to 20 full spring turns for optimal retraction speed).
Follow these key steps to mount a vertical pull-down retractable screen:
- Mount Cassette Housing: Position the cassette housing flush at the head jamb (top inside edge) of the window opening with the flat side facing outward, securing it with the provided hardware.
- Attach Side Rails: Slide side guide rails onto the cassette end-cap connectors. Ensure they sit square and plumb against the side jambs. Use a specialized plastic pile opener tool when driving fasteners to avoid squashing the brush weatherstripping.
- Test Latch and Adjust Clearance: Pull the screen handle drawbar down to the window sill. If the latch does not engage the bottom stops smoothly, insert a thin putty knife under the guide rails to make minor clearance adjustments before driving final jamb screws.
Refer to the engineering specifications and setup diagrams provided with your retractable screen unit for additional mounting details.
Step-by-Step Guide to Rescreening and Frame Fabrication
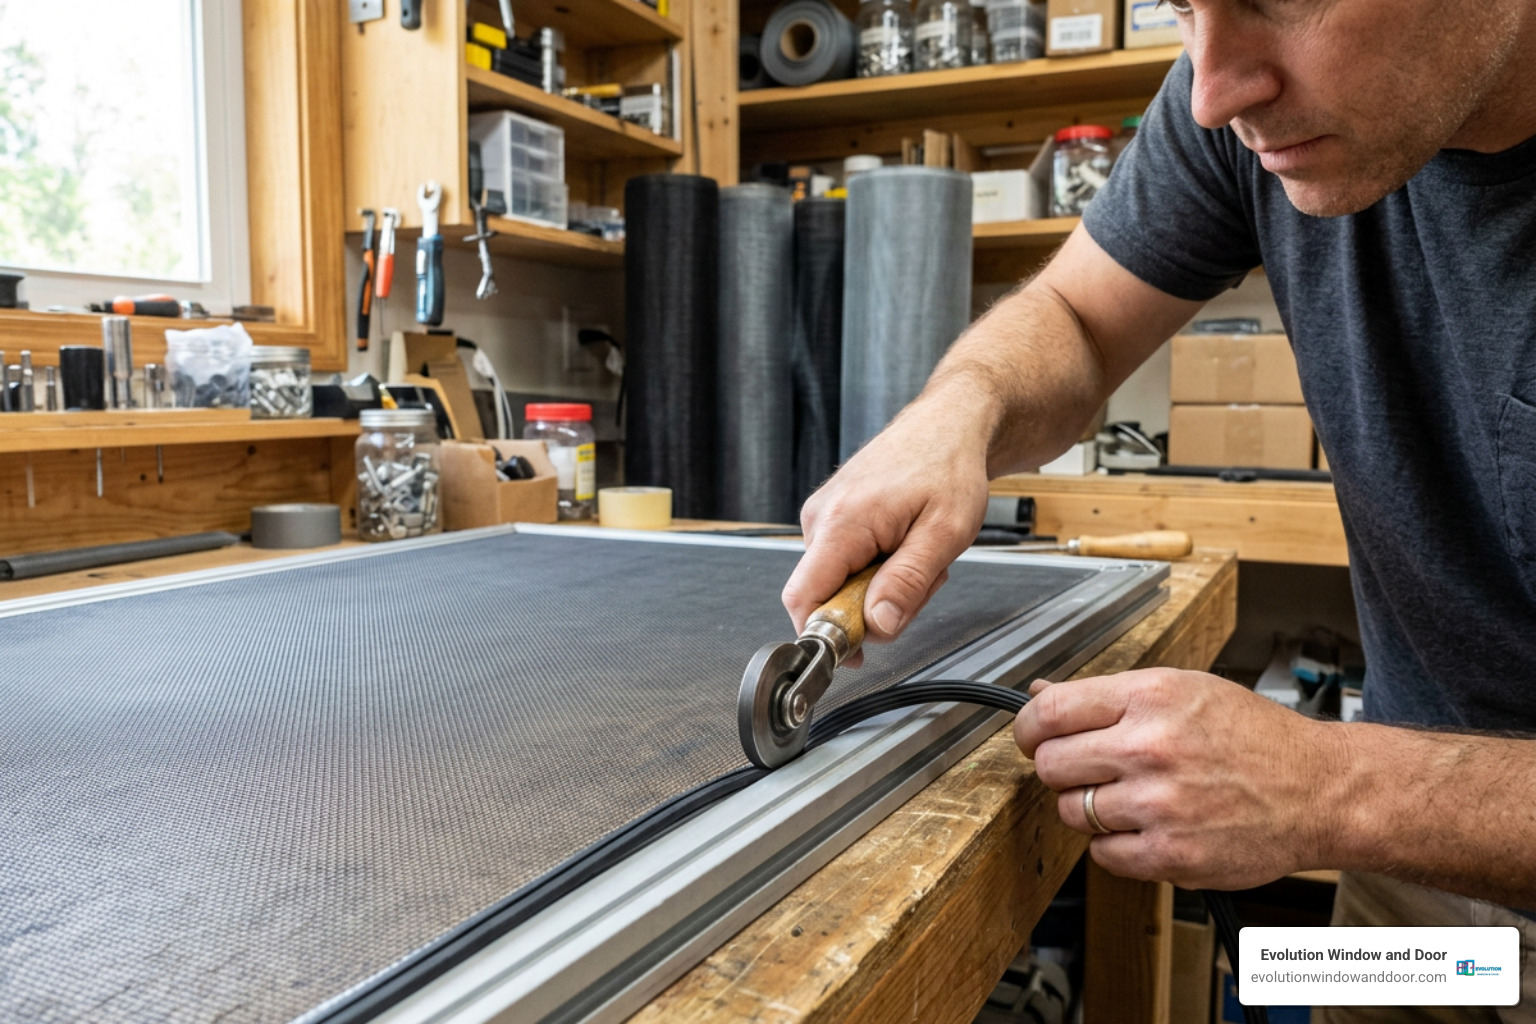
Whether you are updating worn fiberglass on an existing frame or fabricating custom screens from raw aluminum stock, rescreening is a practical DIY task.
Rescreening vs Custom Frame Fabrication for Window Screen Installation
Rescreening an existing, undamaged screen frame is straightforward and cost-effective. However, if your aluminum frame rails are bent, rusted, or out of square, building a new custom frame is the better long-term option.
Follow these practical steps to rescreen an existing frame:
- Remove Old Spline and Damaged Mesh: Use a small flathead screwdriver or an awl to lift the end of the old vinyl spline cord from the frame channel. Pull the spline completely out and discard the damaged mesh. Clean dust and debris out of the channel using a wire brush.
- Secure the Frame: Lay your screen frame flat on a wide table or work workbench. Apply strips of masking tape across the exterior middle edges of the metal frame rails to anchor the frame to your work surface. This prevents the side rails from bowing inward while rolling the mesh.
- Align Screening Material: Unroll your screening mesh over the frame, ensuring a 1/2-inch overlap beyond the spline channels on all four sides. Cut the mesh to size using scissors.
- Notch the Corners: Cut a 45-degree angle across each of the four mesh corners just outside the corner spline channel. This prevents extra material from bunching up inside the corner joints.
- Roll the Spline: Start at one corner. Place the vinyl spline cord on top of the mesh directly over the groove. Using the concave wheel of your spline roller, press the spline firmly into the channel. Hold the mesh lightly taut with your non-dominant hand ahead of the roller. Guide the spline around all four sides, using a flathead screwdriver to push the spline deep into the right-angle corners.
- Trim Excess Screening: Hold a fresh utility knife blade at a 45-degree angle along the outer wall of the spline groove. Gently slice away excess screening material. Always cut along the outer shoulder of the groove so you do not accidentally slice the new mesh stretched across the frame center.
Assembling a Custom Screen Frame from Scratch
If your window opening is missing its original screen entirely, building a new aluminum frame is a simple project:
- Calculate and Cut Frame Stock: Using the 1-1/2-inch Corner Deduction Rule, measure your aluminum frame stock and make straight, 90-degree square cuts using a miter box and fine-tooth hacksaw. File away any rough metal burrs.
- Insert Corner Connectors: Press plastic L-shaped corner inserts firmly into the hollow ends of the metal frame pieces to square up the four corners. Tap them gently with a rubber mallet if needed until flush.
- Attach a Crossbar (If Exceeding 36 Inches): For taller frames, slide crossbar clips into the middle section of vertical frame rails before locking the corners, and snap a pre-cut aluminum crossbar into place.
- Check for Frame Squareness: Measure diagonally from top-left to bottom-right, then top-right to bottom-left across your assembled rectangular frame. If both diagonal measurements match, your frame is perfectly square and ready for mesh installation.
Screen Installation Troubleshooting and Care
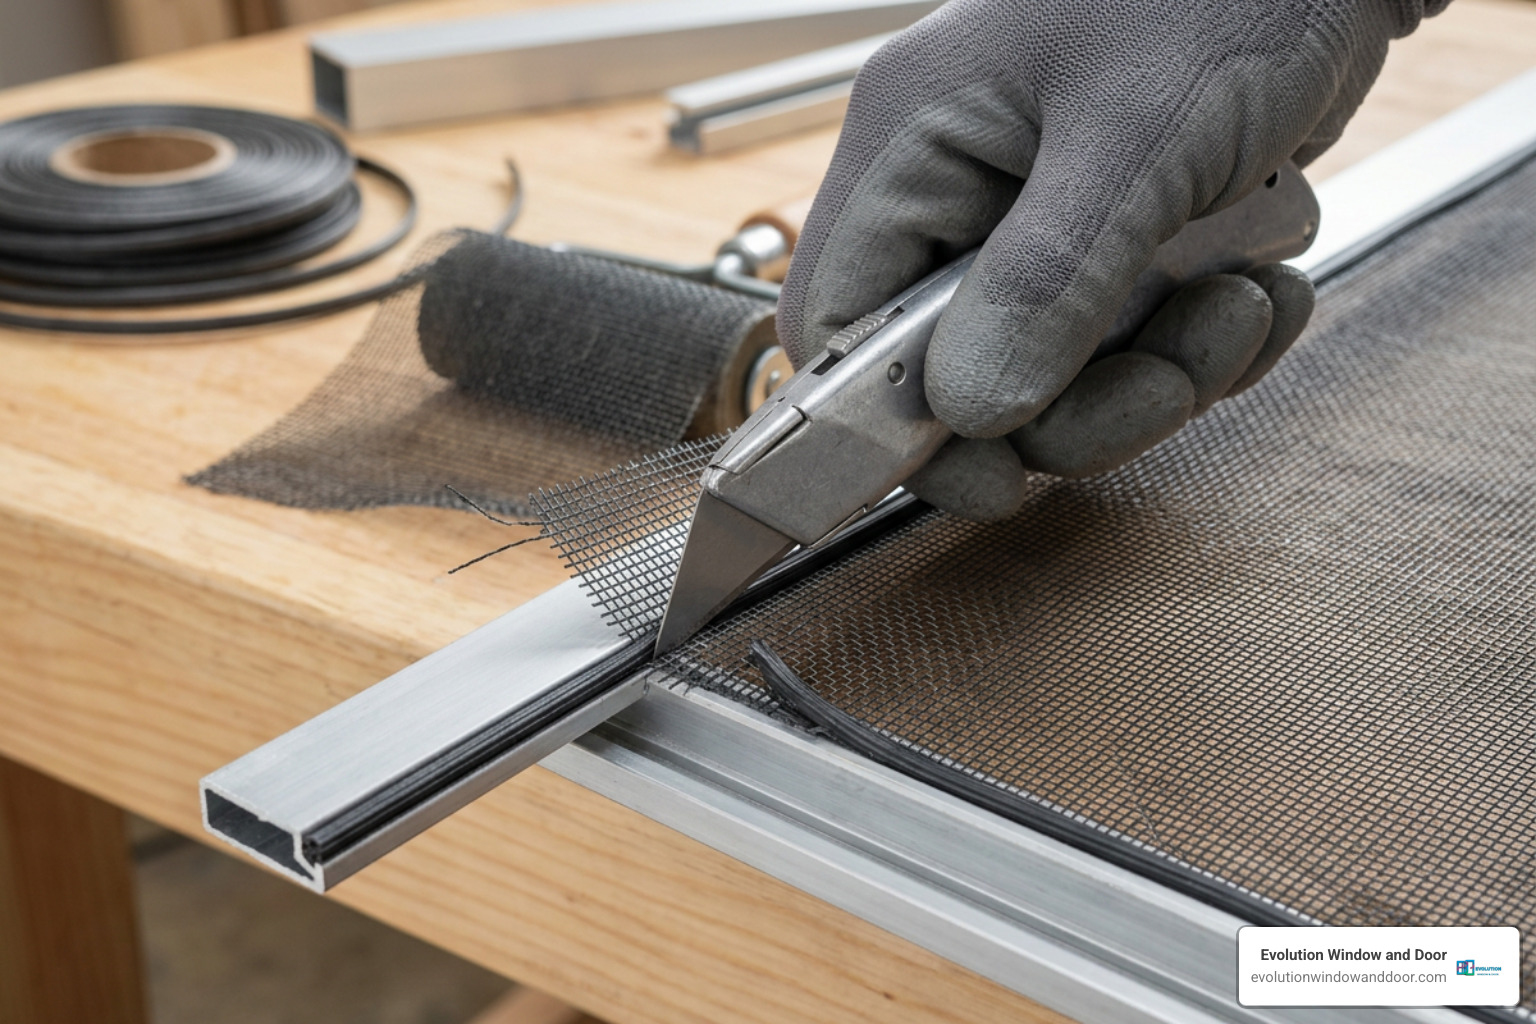
Even with careful work, minor issues like sagging mesh or frame bowing can occur during DIY screen updates. Here is how to troubleshoot and fix common issues quickly:
- Preventing Hourglassing: If the center of your vertical frame rails pull inward like an hourglass after rolling spline, the mesh was pulled too tightly across the frame width. Cut the old spline, strip the mesh, install a cross brace, and re-roll using light hand tension.
- Fixing Screen Mesh Sag: Loose or wavy mesh results from insufficient fabric tension during spline insertion. Remove the spline along two adjacent sides, pull the mesh lightly taut, and re-roll using the convex wheel to seat the fabric deeper into the channel before pressing the spline back into place.
- Matching Spline Size: Using the wrong spline size is a frequent cause of assembly issues. Standard frame grooves typically require a 9/64-inch (.160) vinyl spline. If you are installing extra-thick screening materials like pet-resistant mesh or SunScreen®, drop down one spline size (e.g., to .140 or .125) so it fits without damaging the frame channel.
- Winter Storage and Weather Maintenance: In regions subject to freezing weather, heavy snow loads can stretch exterior screening, and standing moisture can oxidize bare metal clips. Store screen frames flat in a garage or shed during winter months.
- Screen Cleaning Best Practices: Clean your window screens twice a year to remove dust, salt spray, and pollen. Lay screens flat on a clean surface, wash gently with warm water and mild dish soap using a soft bristle brush, rinse with a garden hose, and let them air dry completely before reinstalling. Avoid pressure washers, as high pressure can blow screening out of its spline track.
Properly maintained window screens complement high-performance window sashes by allowing fresh air ventilation without sacrificing home comfort. To learn how modern windows optimize thermal efficiency throughout your home, read our guide on How Doors and Windows Work Together for Energy Efficiency.
Frequently Asked Questions About Window Screen Installation
How do I stop my screen mesh from sagging during installation?
To keep screen mesh smooth and drum-tight without sagging:
- Avoid pulling the mesh forcefully across the frame by hand before rolling spline. Excessive pulling causes uneven tension and skews the weave.
- Maintain light hand tension straight ahead of your spline rolling tool as you work along the channel.
- When working with stiffer screen materials like aluminum wire or pet mesh, use the rounded convex wheel of your screen tool to pre-crease the material into the frame channel before rolling the vinyl spline into place.
- Ensure your vinyl spline diameter accurately matches your frame channel width and screen mesh thickness.
Should screens be installed on the interior or exterior of the window?
Screen placement depends entirely on how your window sash operates:
- Double-Hung and Single-Hung Windows: Feature sashes that move vertically inside interior tracks, so their screen frames install on the exterior channel of the window frame.
- Casement and Awning Windows: Crank outward toward the exterior, which requires screen frames to be mounted on the interior room side.
- Horizontal Sliding Windows: Position screens inside dedicated exterior or interior sliding track channels, depending on whether the active sash glides along the inner or outer track.
How do I know what size spline to buy for my screen frame?
Choosing the right spline size depends on your frame channel width and screen mesh thickness:
- Standard Applications: Standard aluminum residential screen frames with charcoal fiberglass mesh typically use a 9/64-inch (.160) round vinyl spline cord.
- Thick Specialty Screening: When using thicker mesh, such as pet-resistant screening or solar heat-blocking mesh, drop down one spline size to 1/8-inch (.125) or .140 to accommodate the extra mesh thickness inside the groove.
- Sizing Tip: If you are unsure, pull a short piece of original spline out of your old frame and take it to your local hardware supplier, or measure the frame groove width with calipers. If spline feels slightly oversized during installation, gently stretching the spline cord lengthwise while rolling will temporarily narrow its diameter, allowing it to slide into tight channels easily.
Conclusion
Mastering DIY window screen installation is a simple project that brings fresh air into your living spaces, keeps insects out, and helps protect your interior from excessive heat. Whether you are replacing torn mesh, rescreening old frames, or installing custom retractable screen units, using accurate measurements and the right techniques ensures a clean, long-lasting finish.
If you are planning a full home refresh or looking to replace aged, drafty sashes with impact-resistant upgrades, explore our complete selection of Stylish Quality Windows. At Evolution Window & Door, we provide homeowners across Southwest Florida with expert guidance, durable installations, and precision-engineered products designed to keep your home safe, comfortable, and energy-efficient year-round.


